
![]()

Adding Power Folding Mirrors to the 2018 Honda Odyssey EX-LWarning: The following describes how I successfully added power folding mirrors to a 2018 Honda Odyssey EX-L using parts from the Elite trim. I've documented this solely for my own personal use. Use this information at your own risk. Summary:The 2018-2019 Honda Odyssey is a tight fit through a 8' wide garage door. I needed to manually lower the driver-wide window and pull in the mirror simply to get into the garage without hitting the garage trim. Power-folding mirrors are available on the 2018 Honda Odyssey top Elite trim but cost ~$10k extra above the EX-L trim which wasn't worth it. Thus, my goal was to provide a few extra inches of clearance for minimal cost. Goals:Add a power folding mirror to the 2018 Honda odyssey EX-L trimInstructions below likely apply to any trim of the 2018 or 2019 Honda Odyssey but my car is 2018 Honda Odyssey EX-L Minimize impact on Honda-installed components and circuitsThe 2018 Honda Odyssey Elite has power-folding mirrors and thus it's possible to buy the Honda-specific switch. I didn't pursue this option because after looking at the wiring diagrams it looked like the power-folding wire harnesses were connected to the power mirrors and might require proprietary programming at a dealer. Thus, I'm using a simple momentary DPDT switch which requires holding for a few seconds to extend or retract the mirror. An added benefit of this approach is that the power-folding is a separate circuit and minimizes impact on other components and their warranty. Only driver-side mirrorsI only needed to mod my driver-side mirror to provide enough clearance to fit in my garage. It should be possible to extend this mod to also add the passenger side. Parts:
Total: $260 Tools:
Service Manuals:
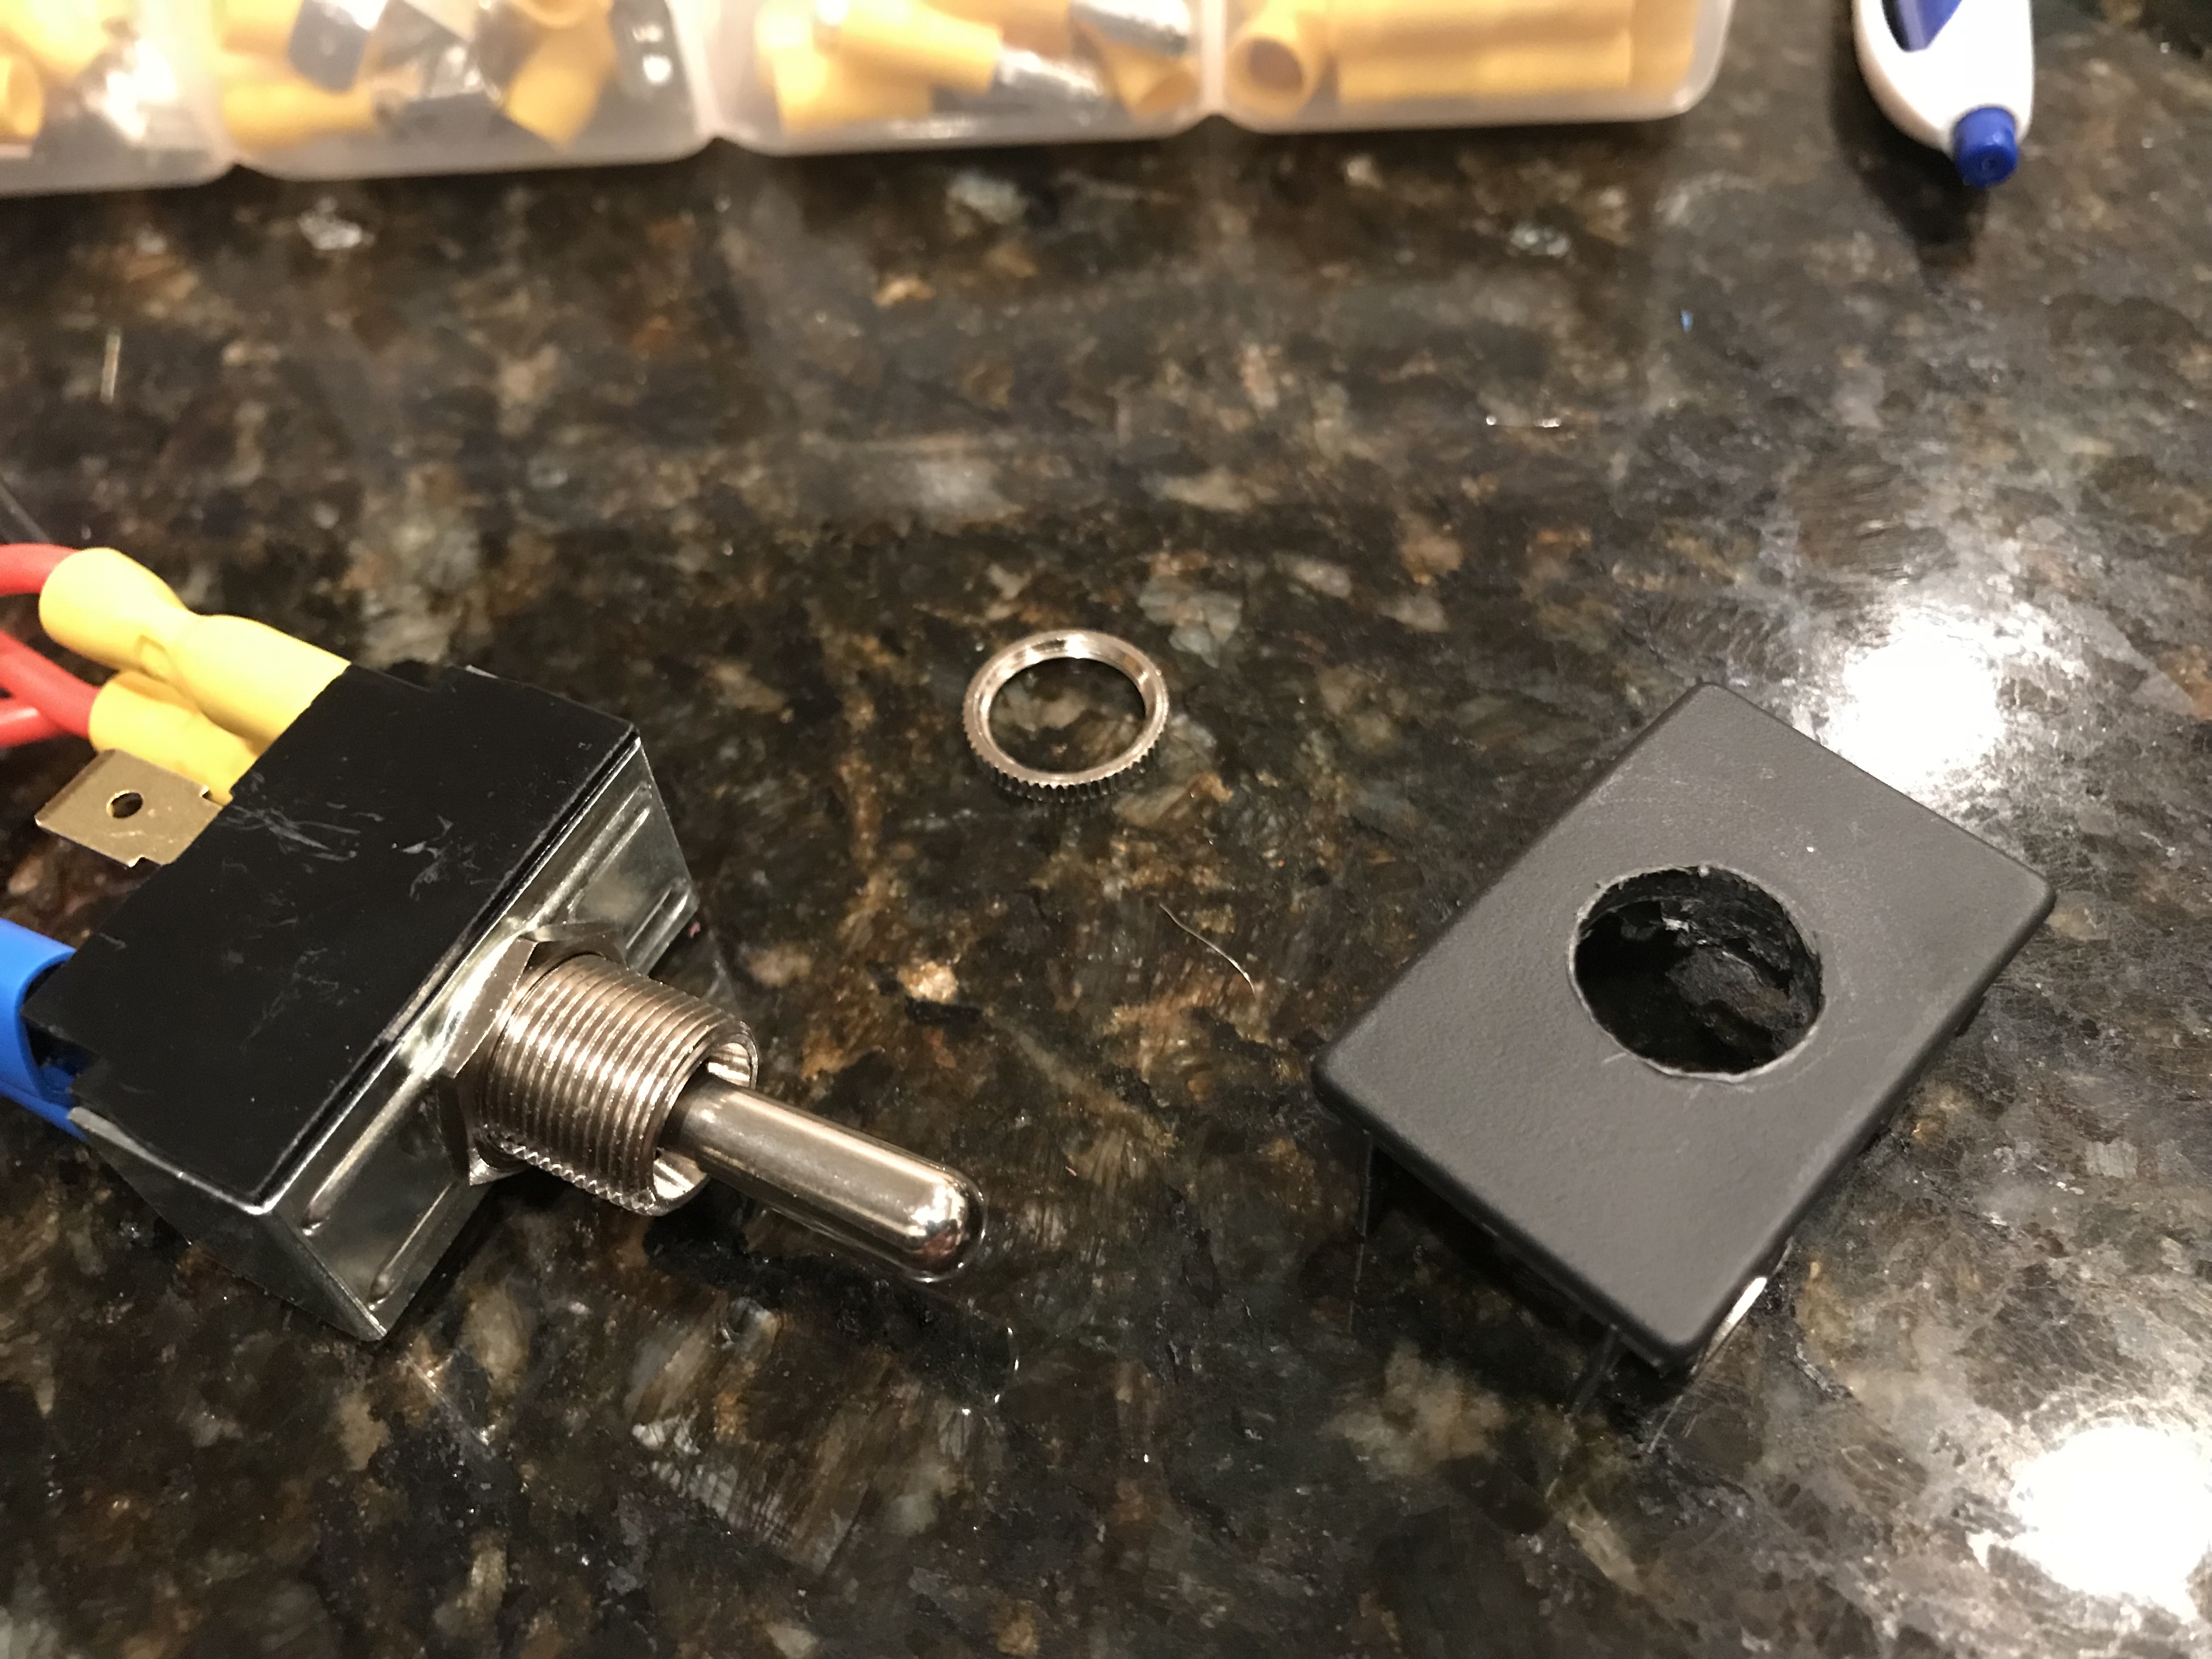
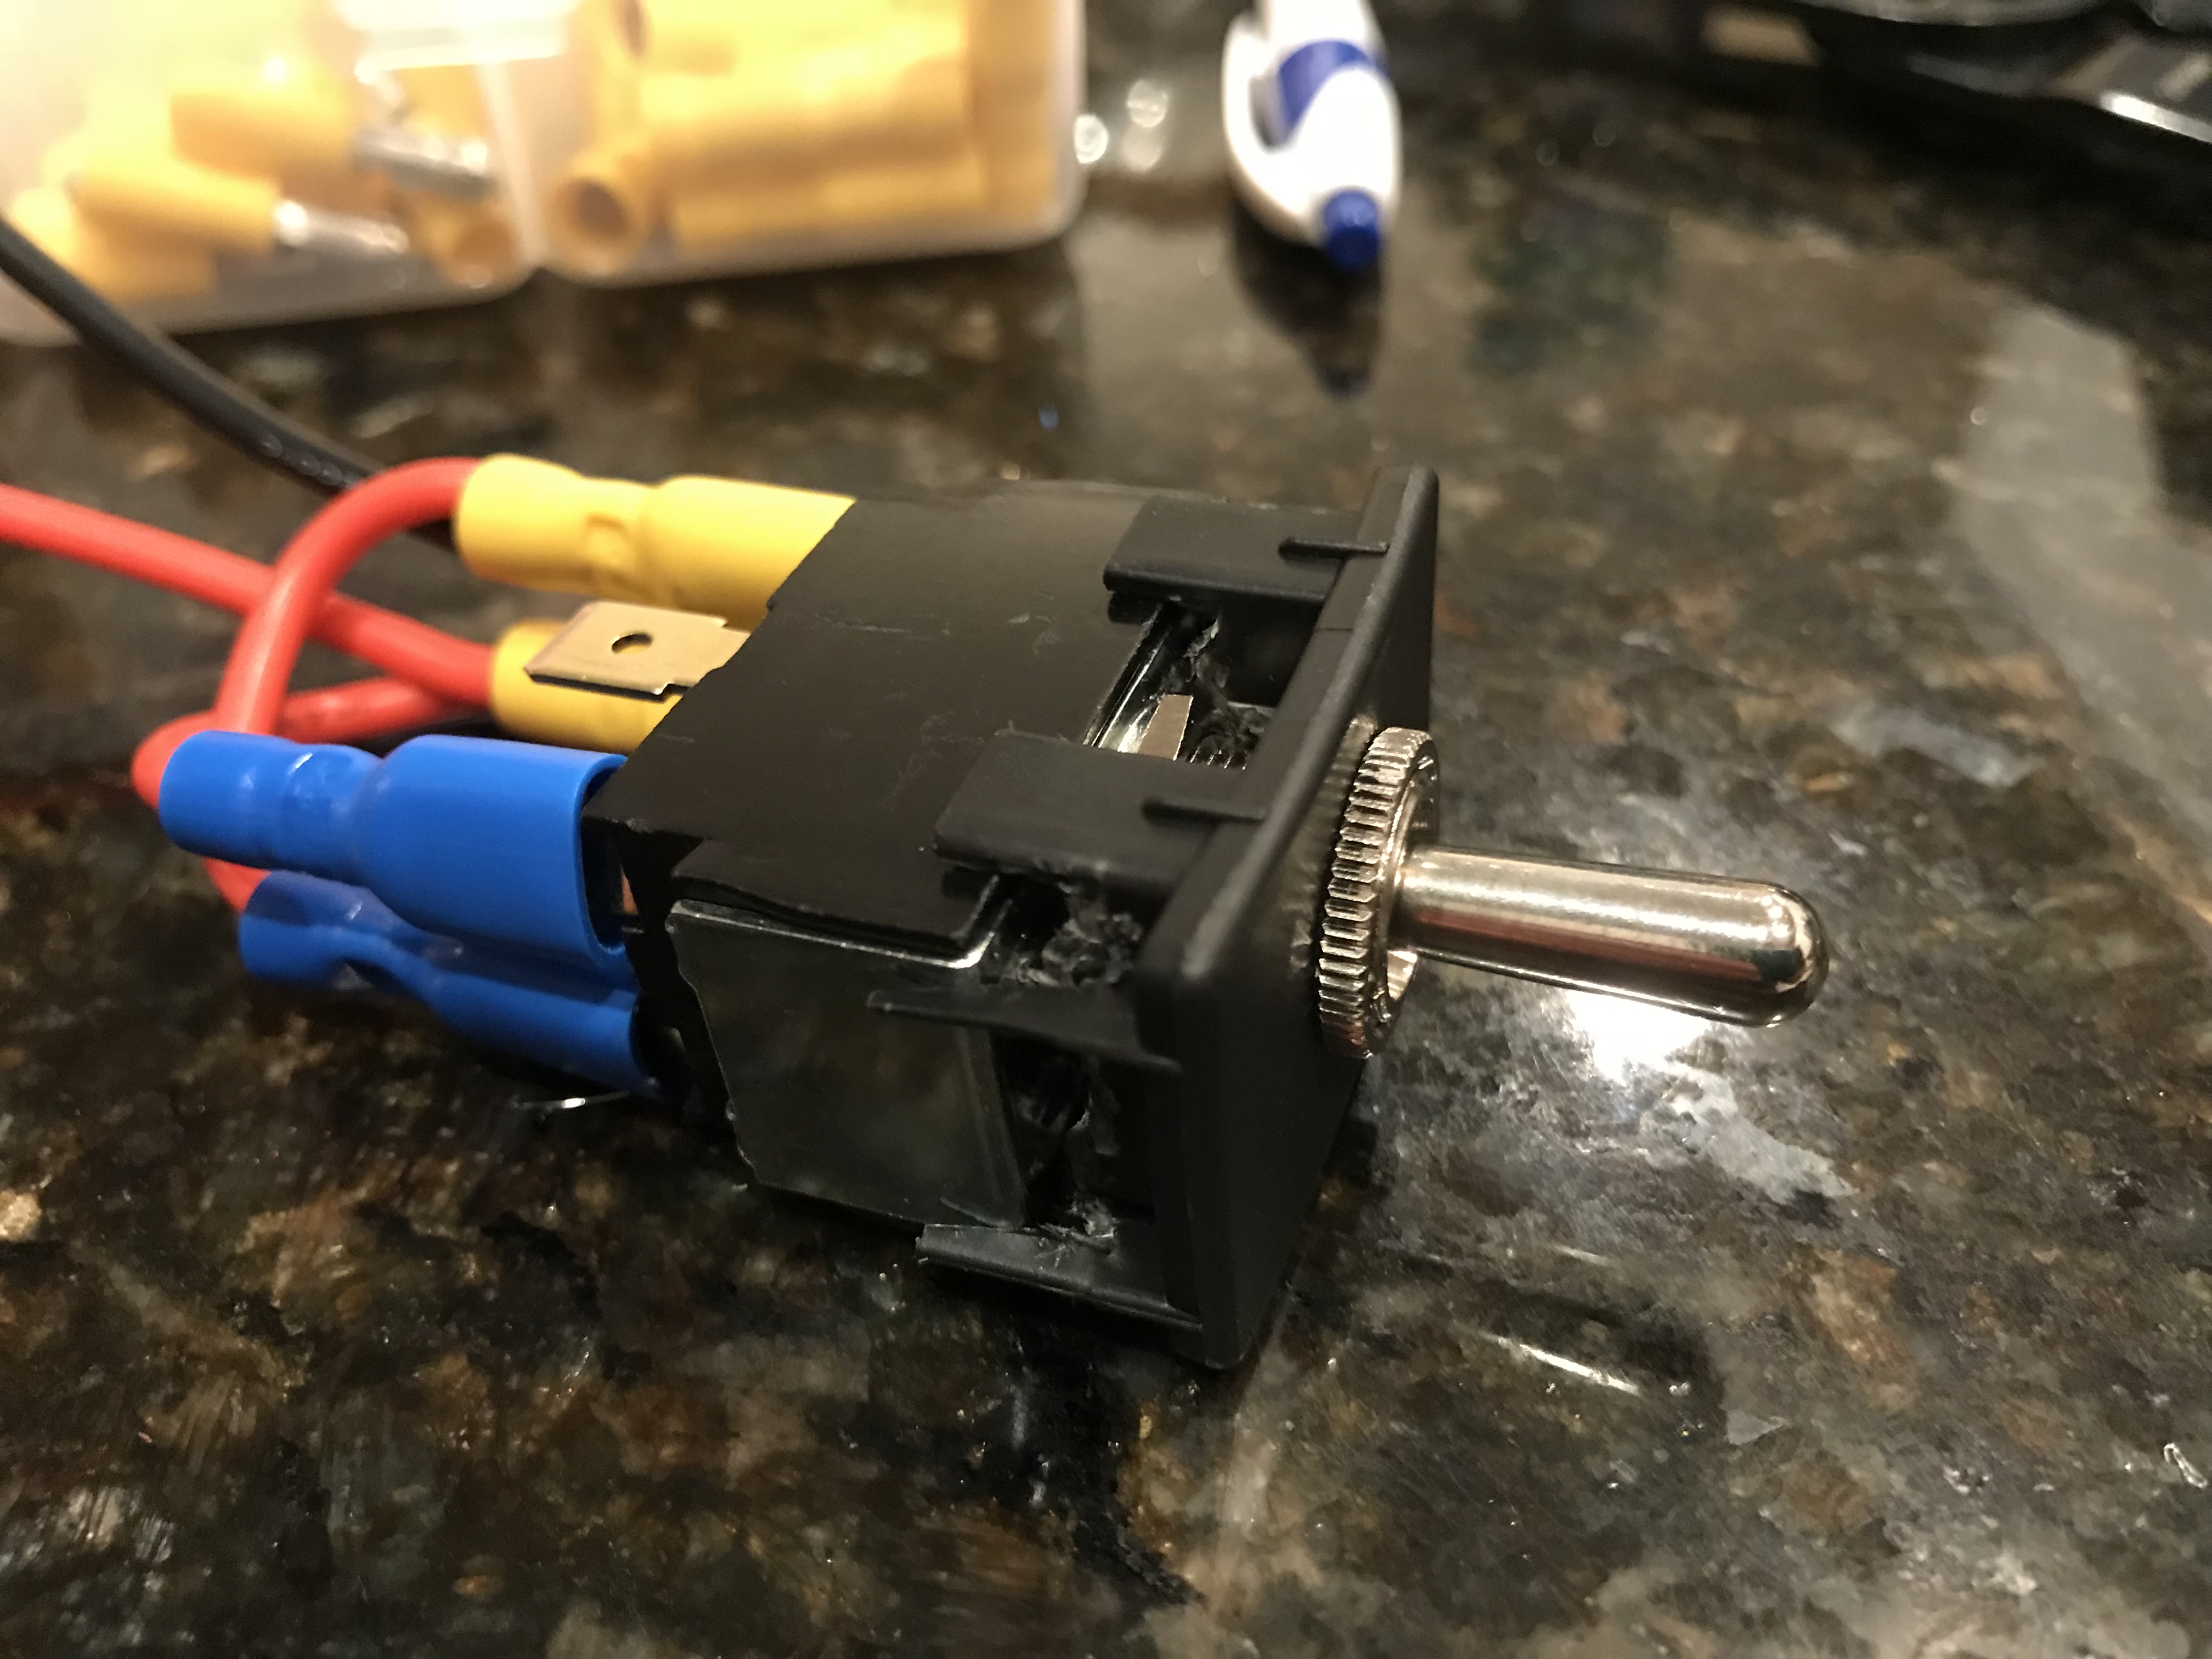
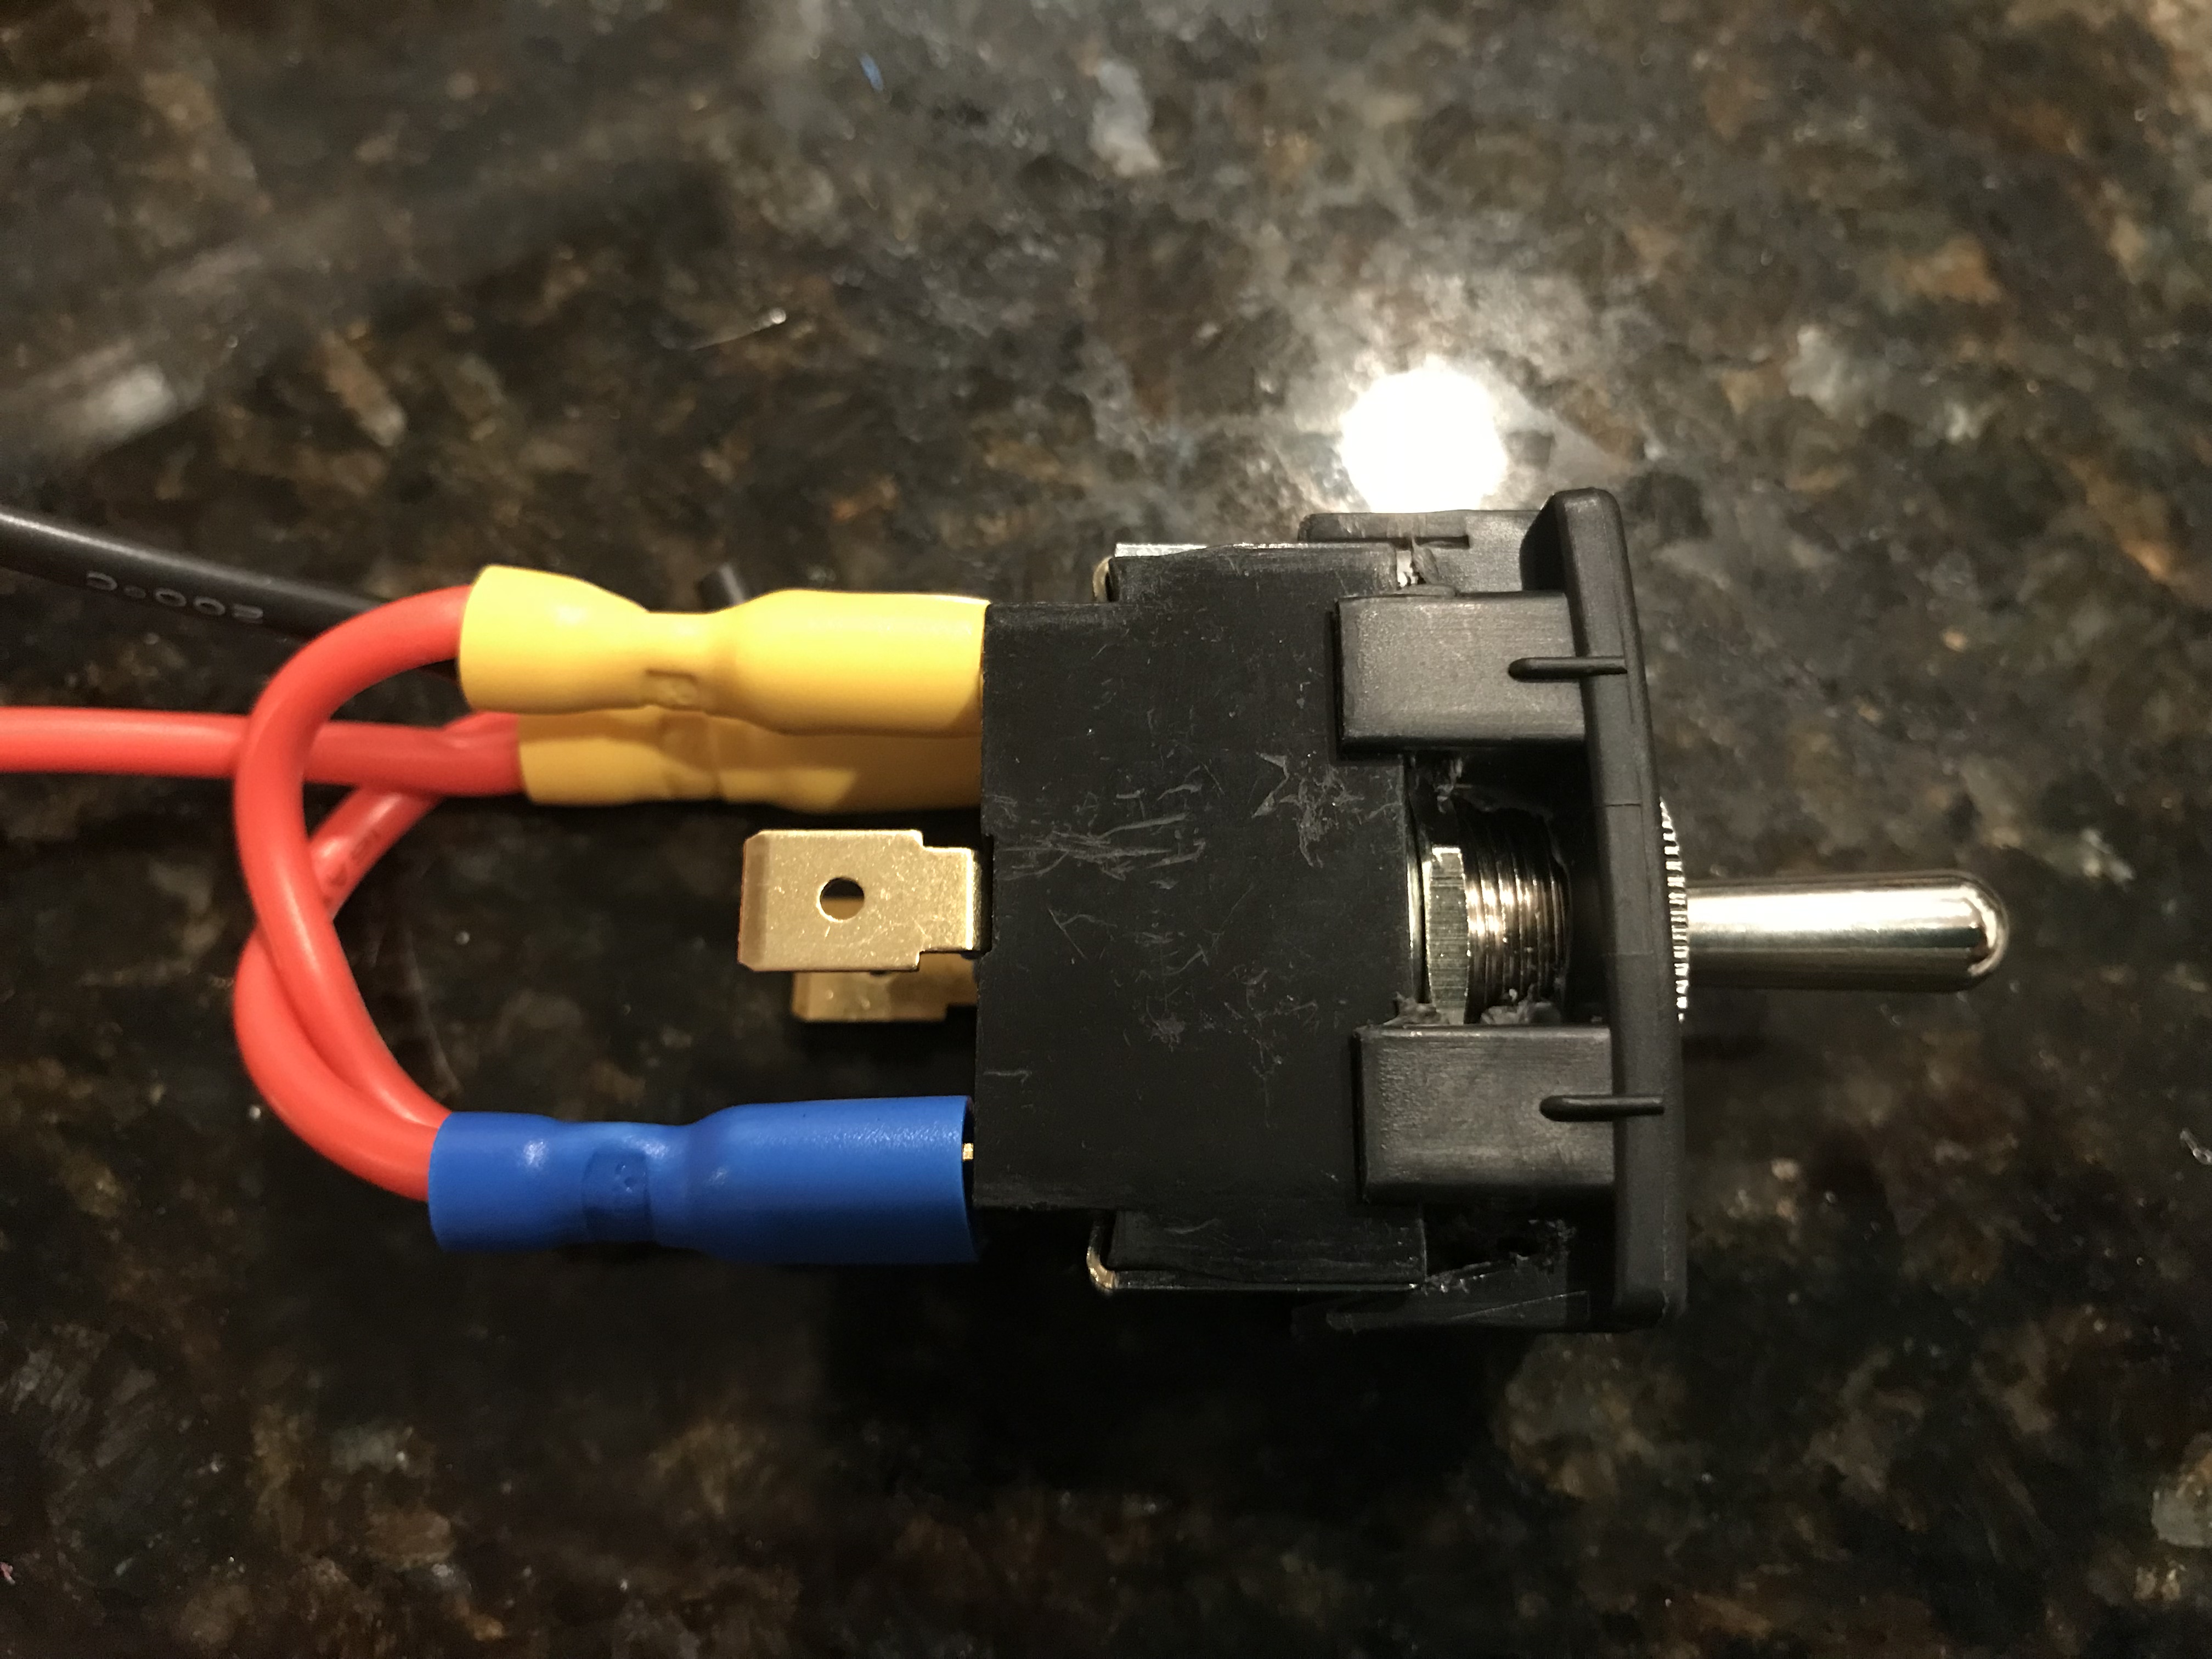
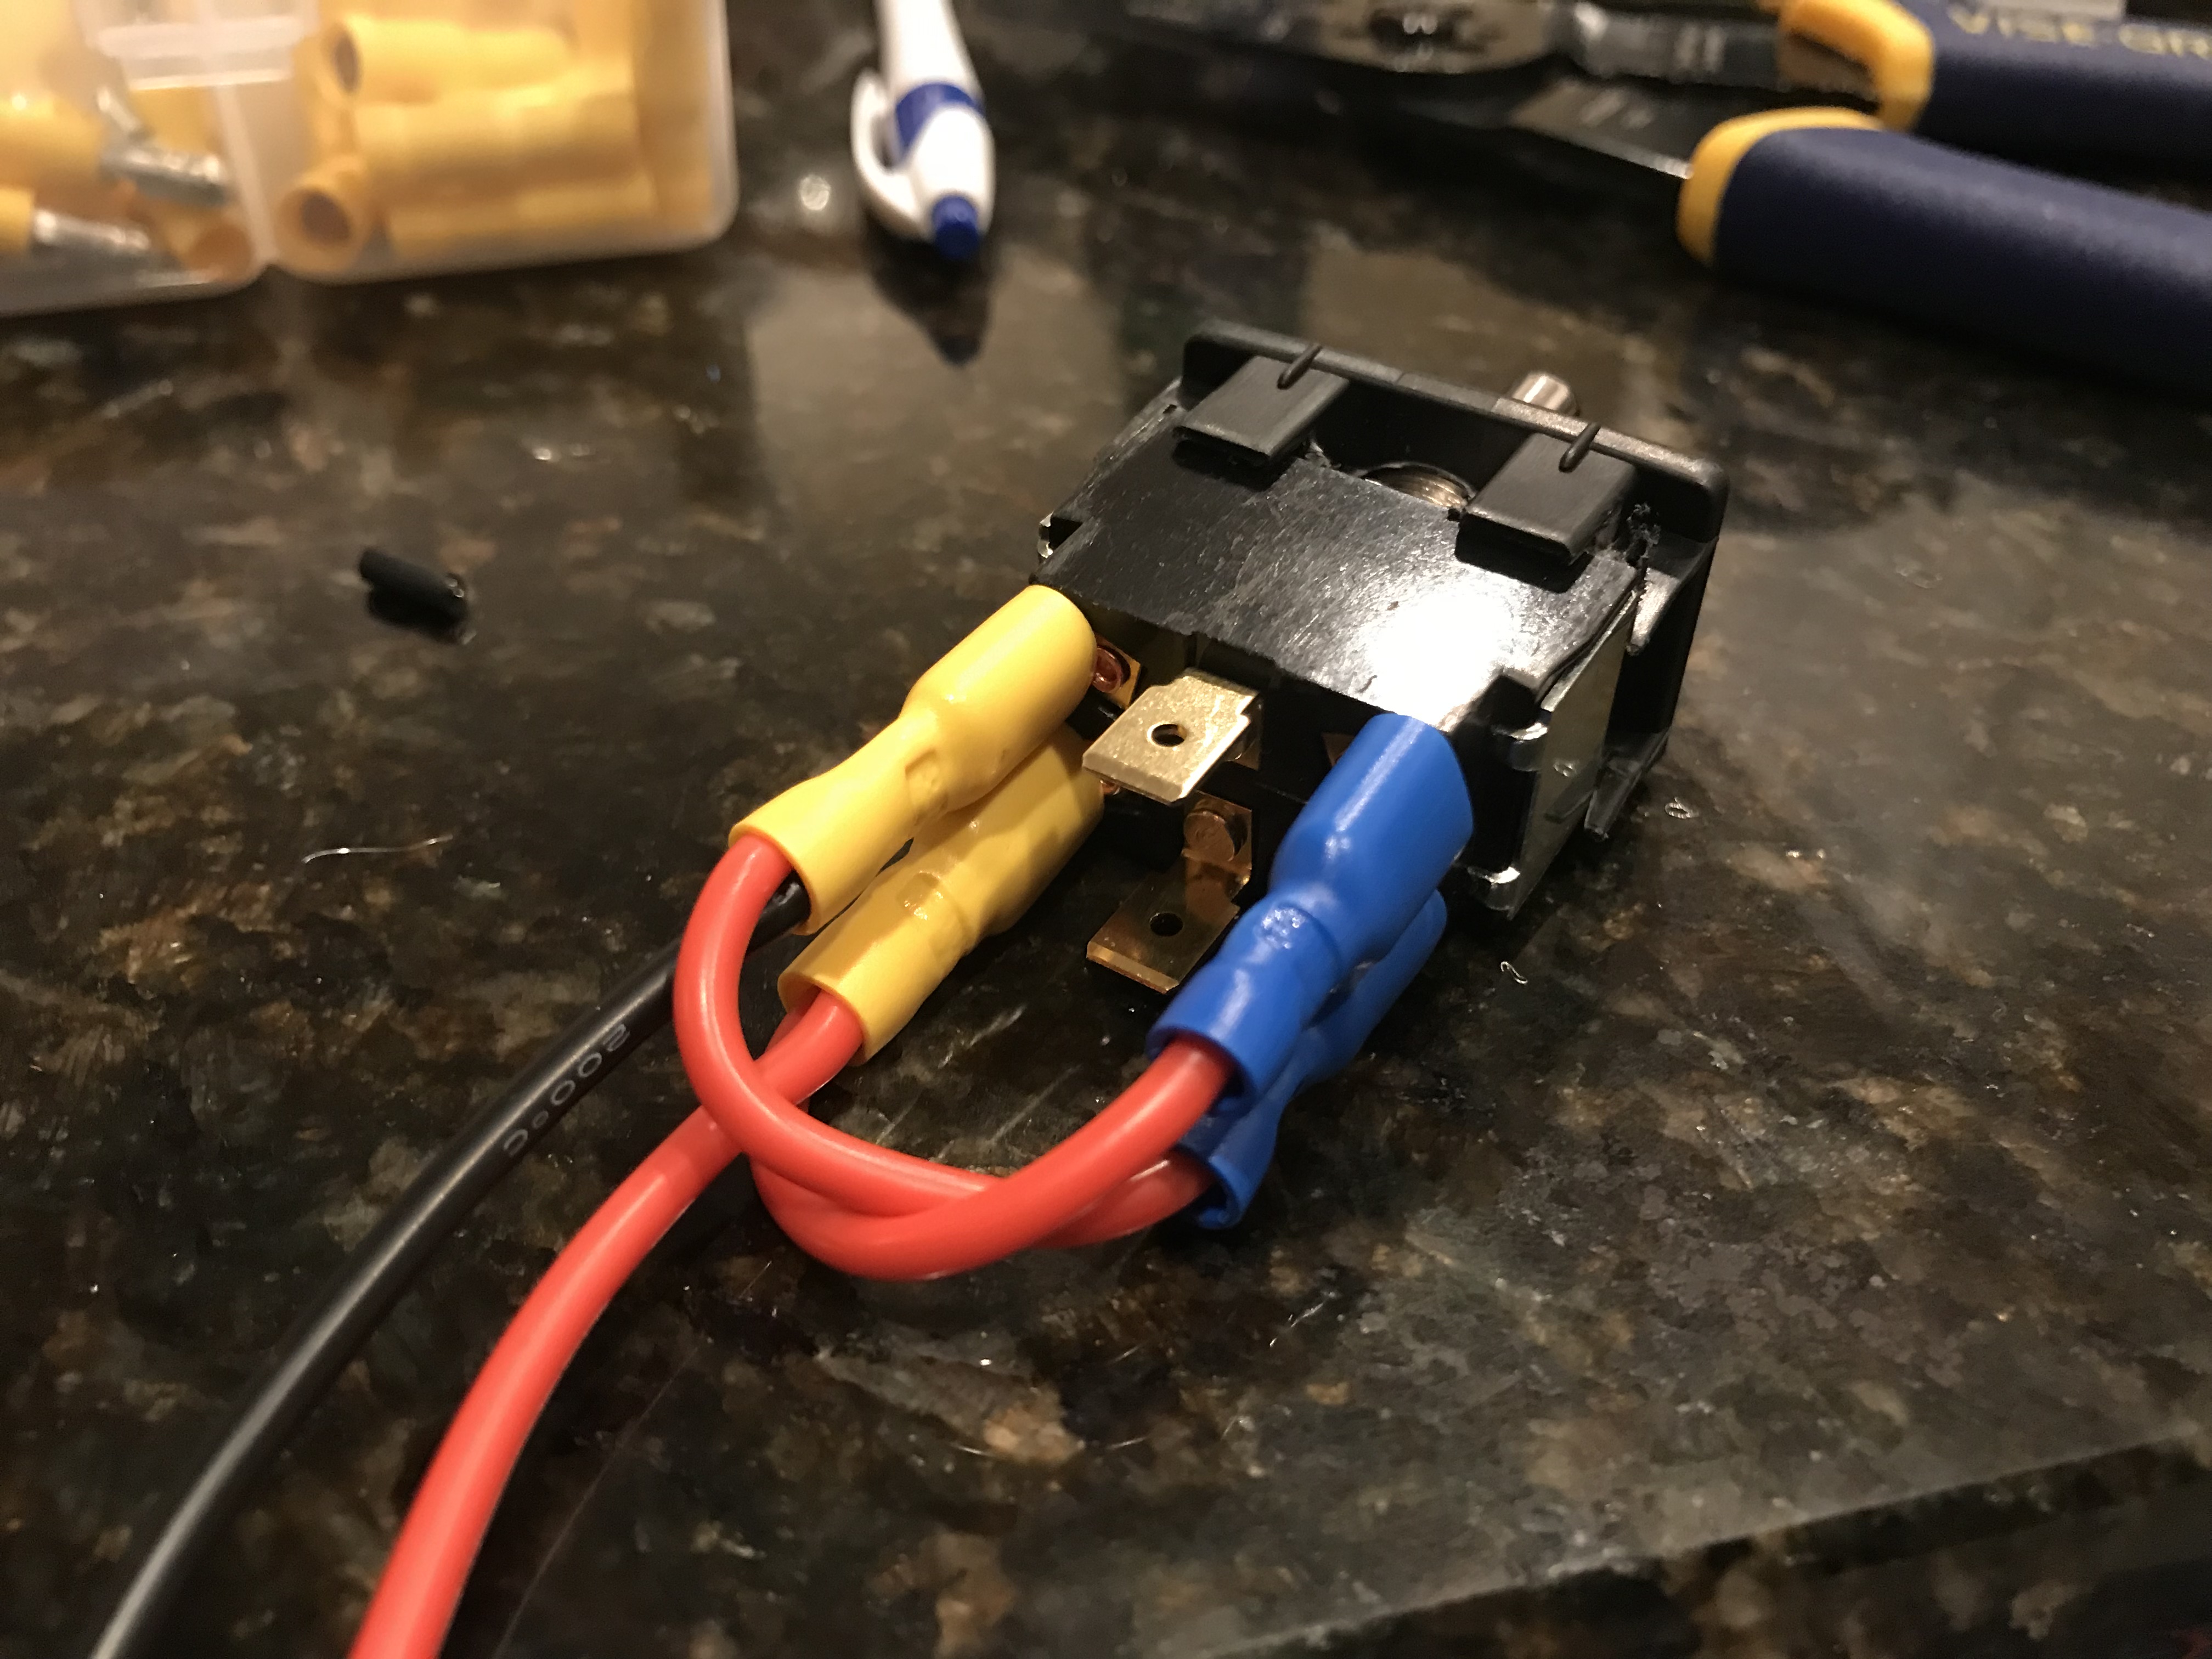
Steps:Select a switchGiven the blank on the left, driver's dashboard needed to find a switch that was small enough to fit through the rear while being large enough to handle the current. After much searching a momentary DPDT switch from Carling Technologies 6GM5M-78 was chosen. This switch has 1/4" quick connect tabs. Hollow out the switch blank to accept the SwitchYou can remove and use the existing switch blank but I ordered a few extra just in case I needed to experiment. Using a diagonal cutting pliers and pliers I hollowed out the inside support plastic tabs, cutting off the back locking tabs and slimming some of the side positional tabs. At the end of the day the DPDT switch is going to get screwed onto the switch blank and the whole part jammed back into the dashboard panel which fits snuggly and holds everything in place. I marked the center of the front of the switch blank and used a 1/2" spade drill bit to cut a hole to insert the switch. After a few rounds of cutting and re-checking fit the 1/2" bushing from the SPDP switch fit through enough to allow me to place the locking nut on the other side, securing the switch to the switch blank. Add cross wires to switchThe DPDT is wired to reverse polarity. For background see instructables HOW TO: Wire a DPDT Rocker Switch for Reversing Polarity
Add battery connectionUsing an Add-a-Circuit fuse tap and a 20 AMP fuse I tapped into the fuse box. I selected another 20A fuse for simplicity, using the "right power window" fuse. This battery connection will be crimped to to the red "cross wire" as described above. 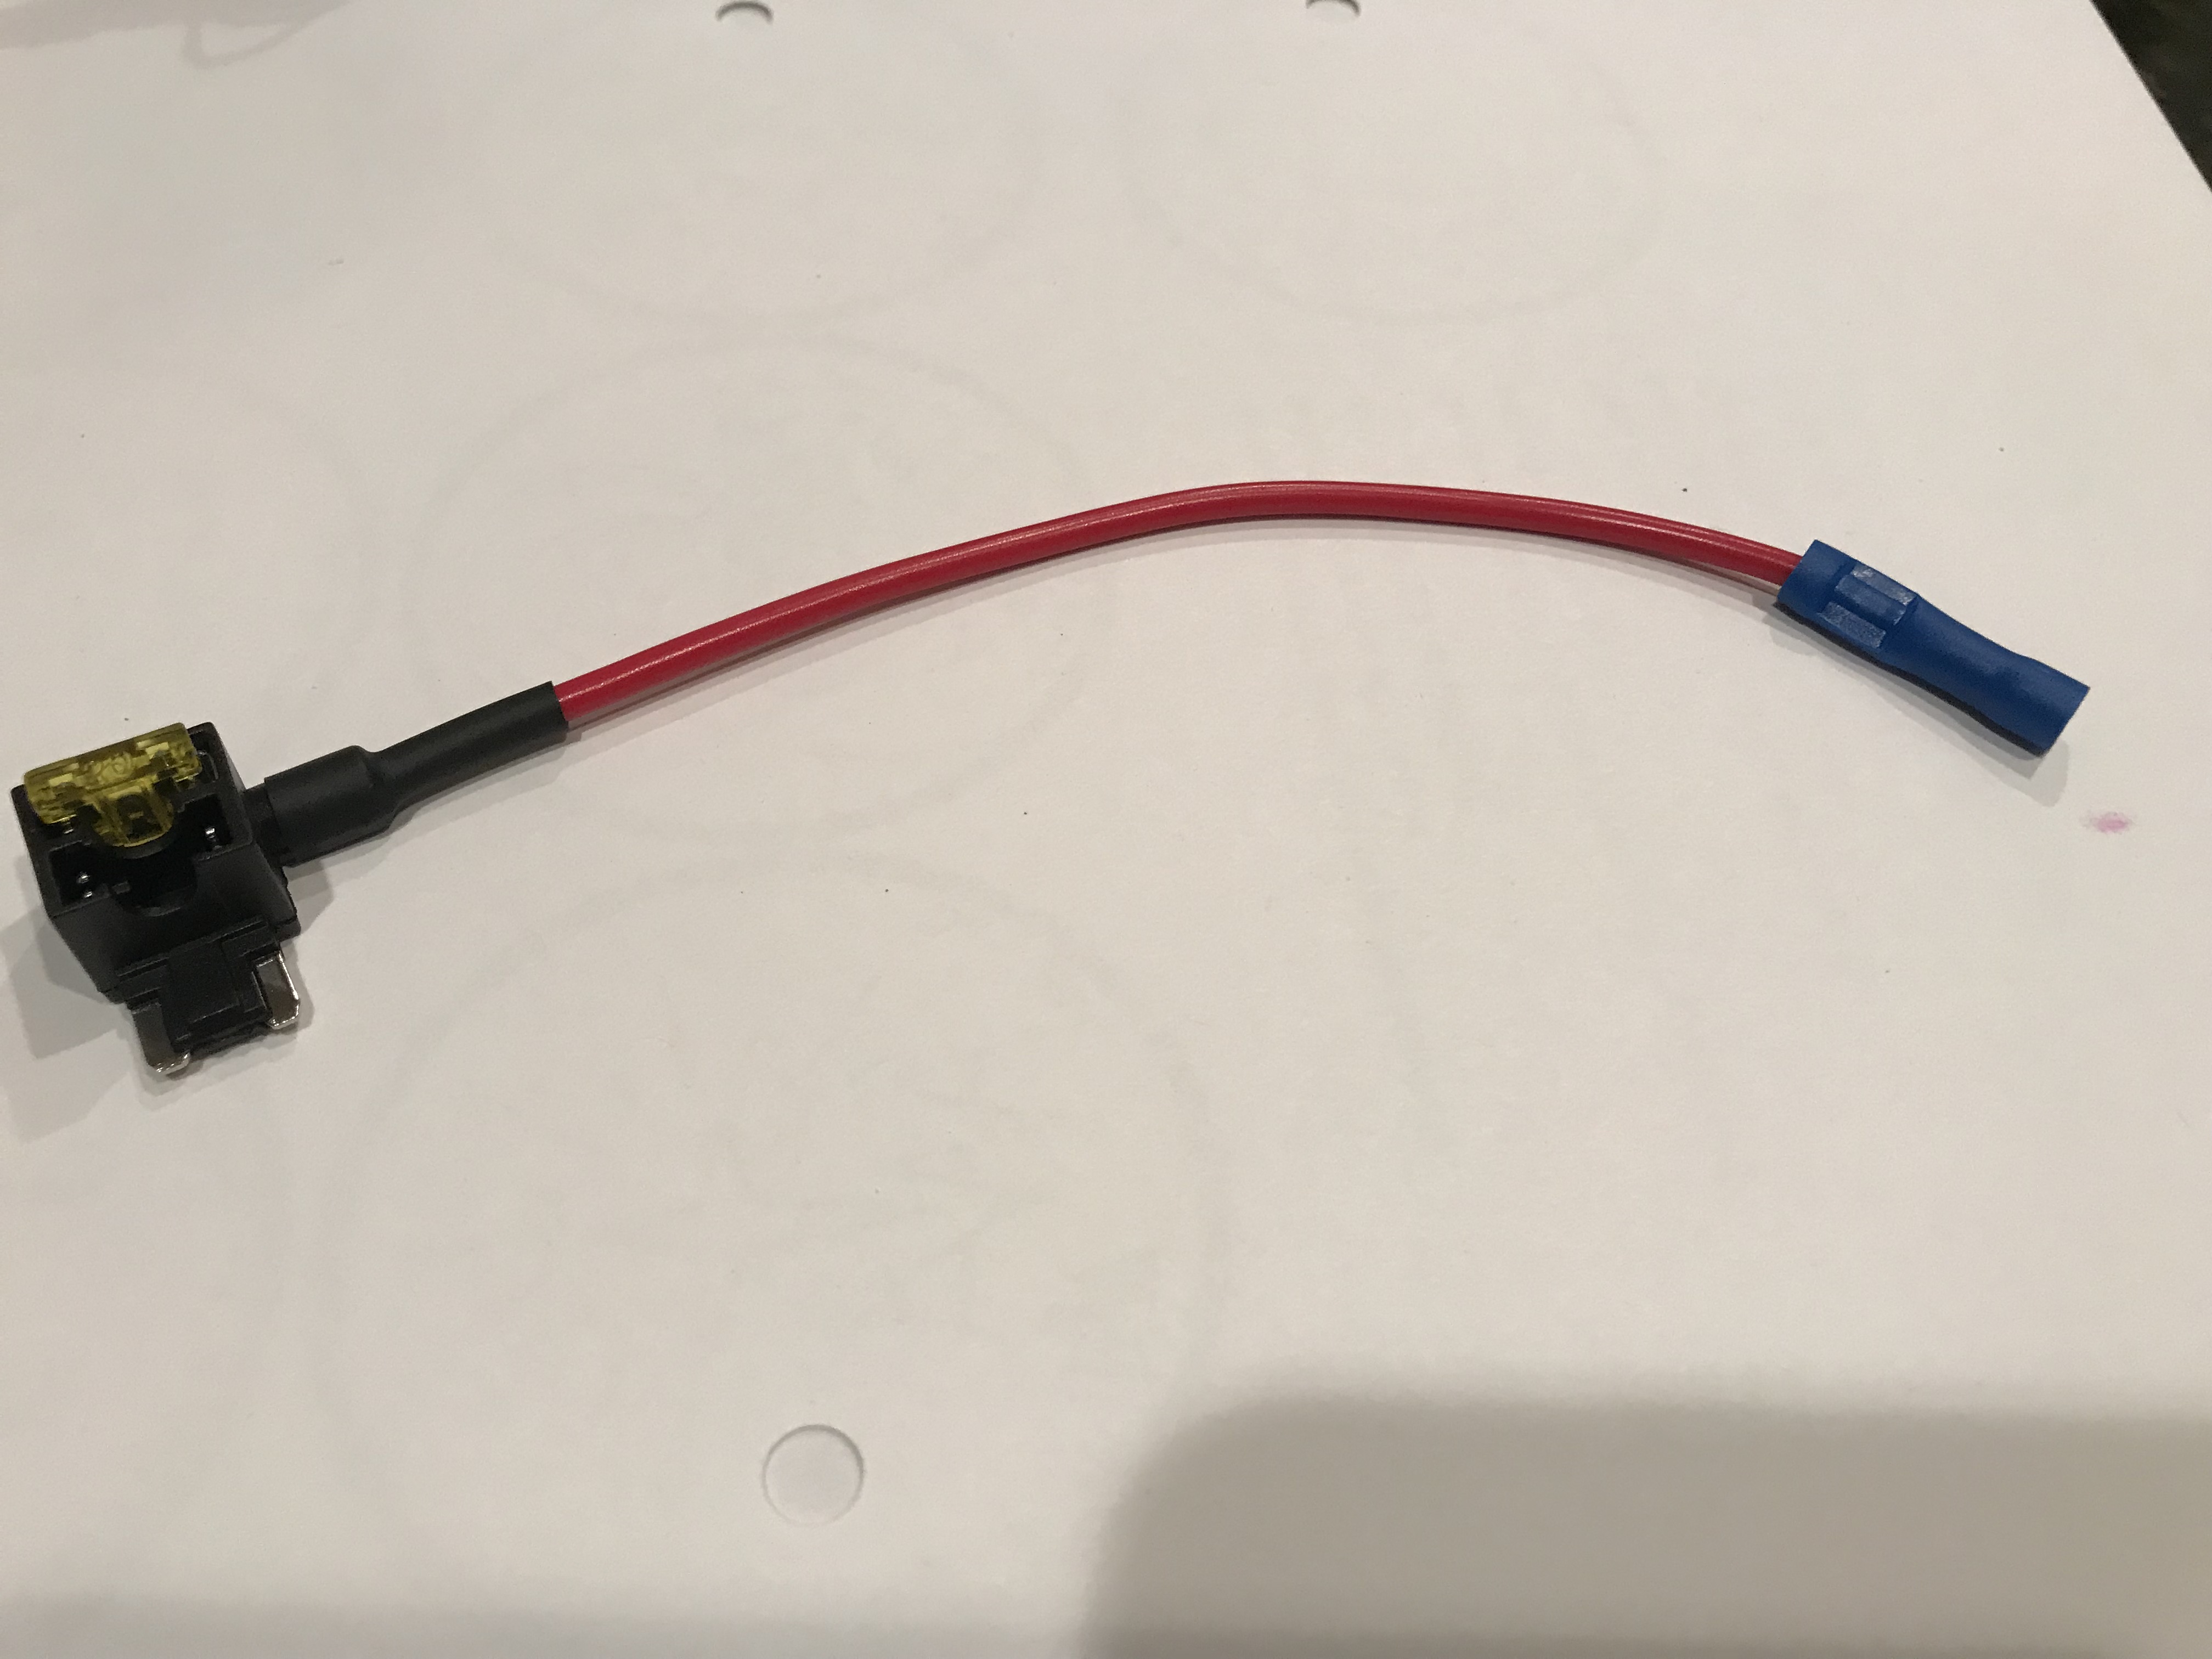
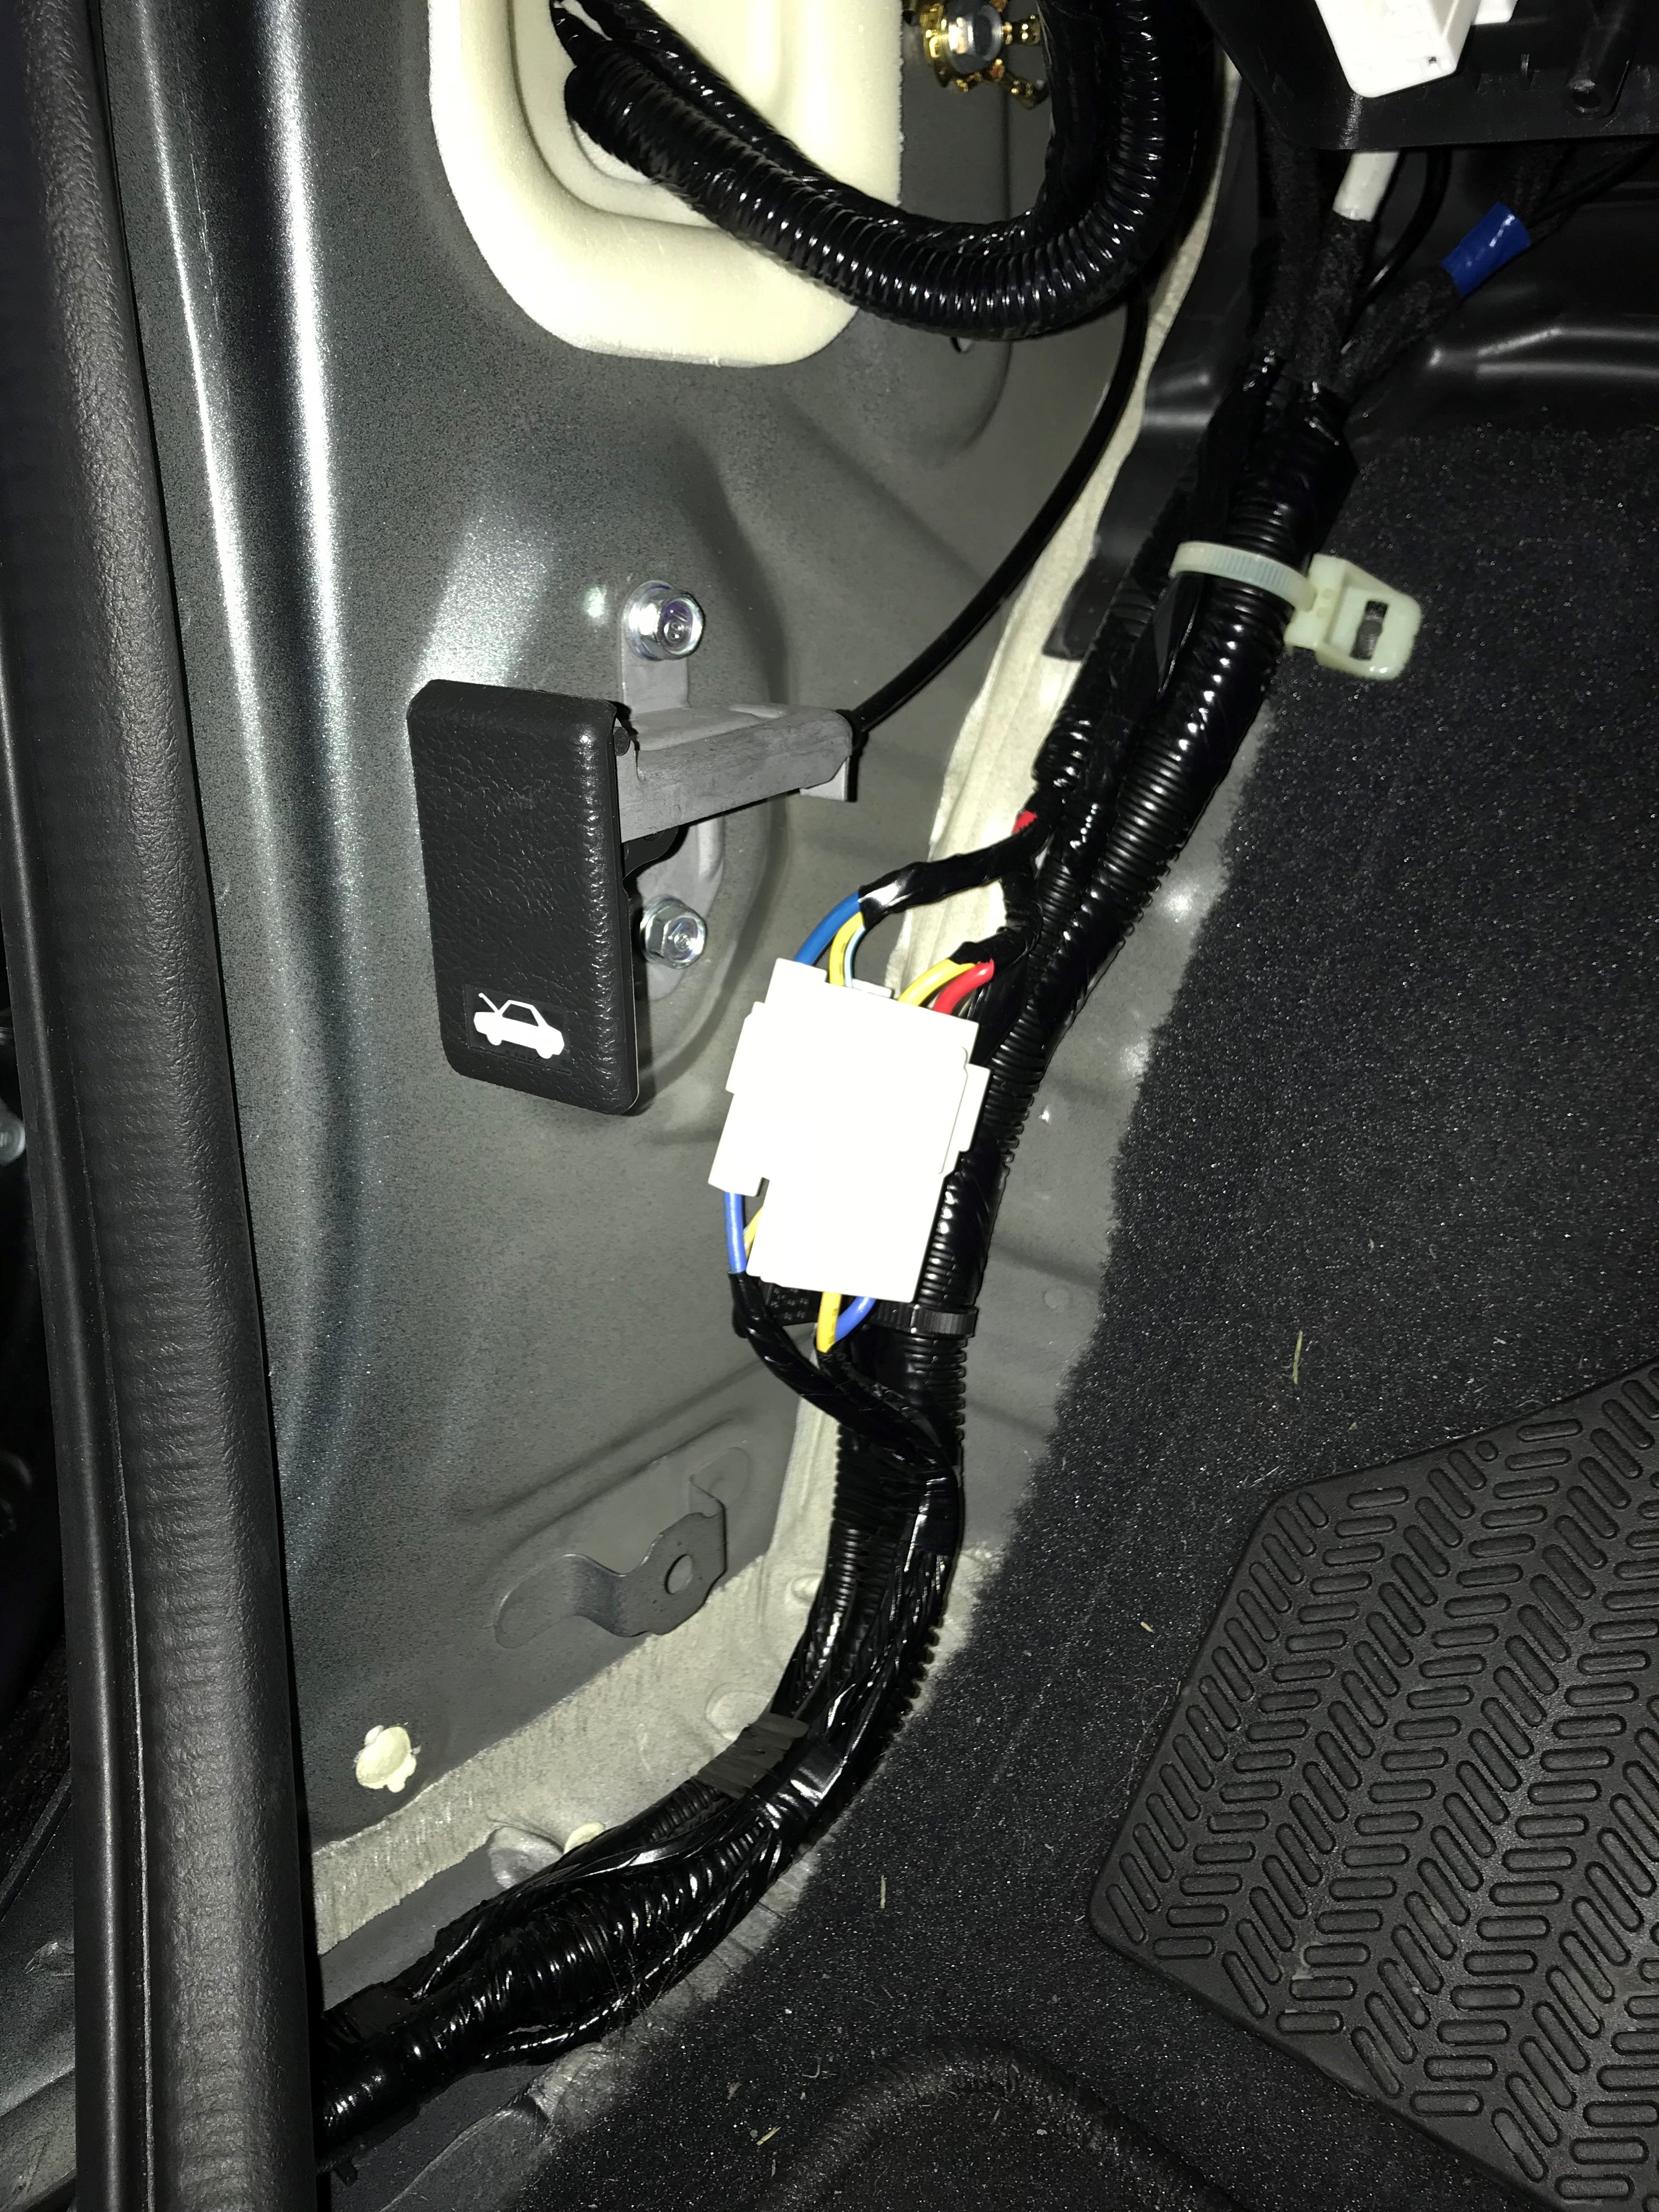
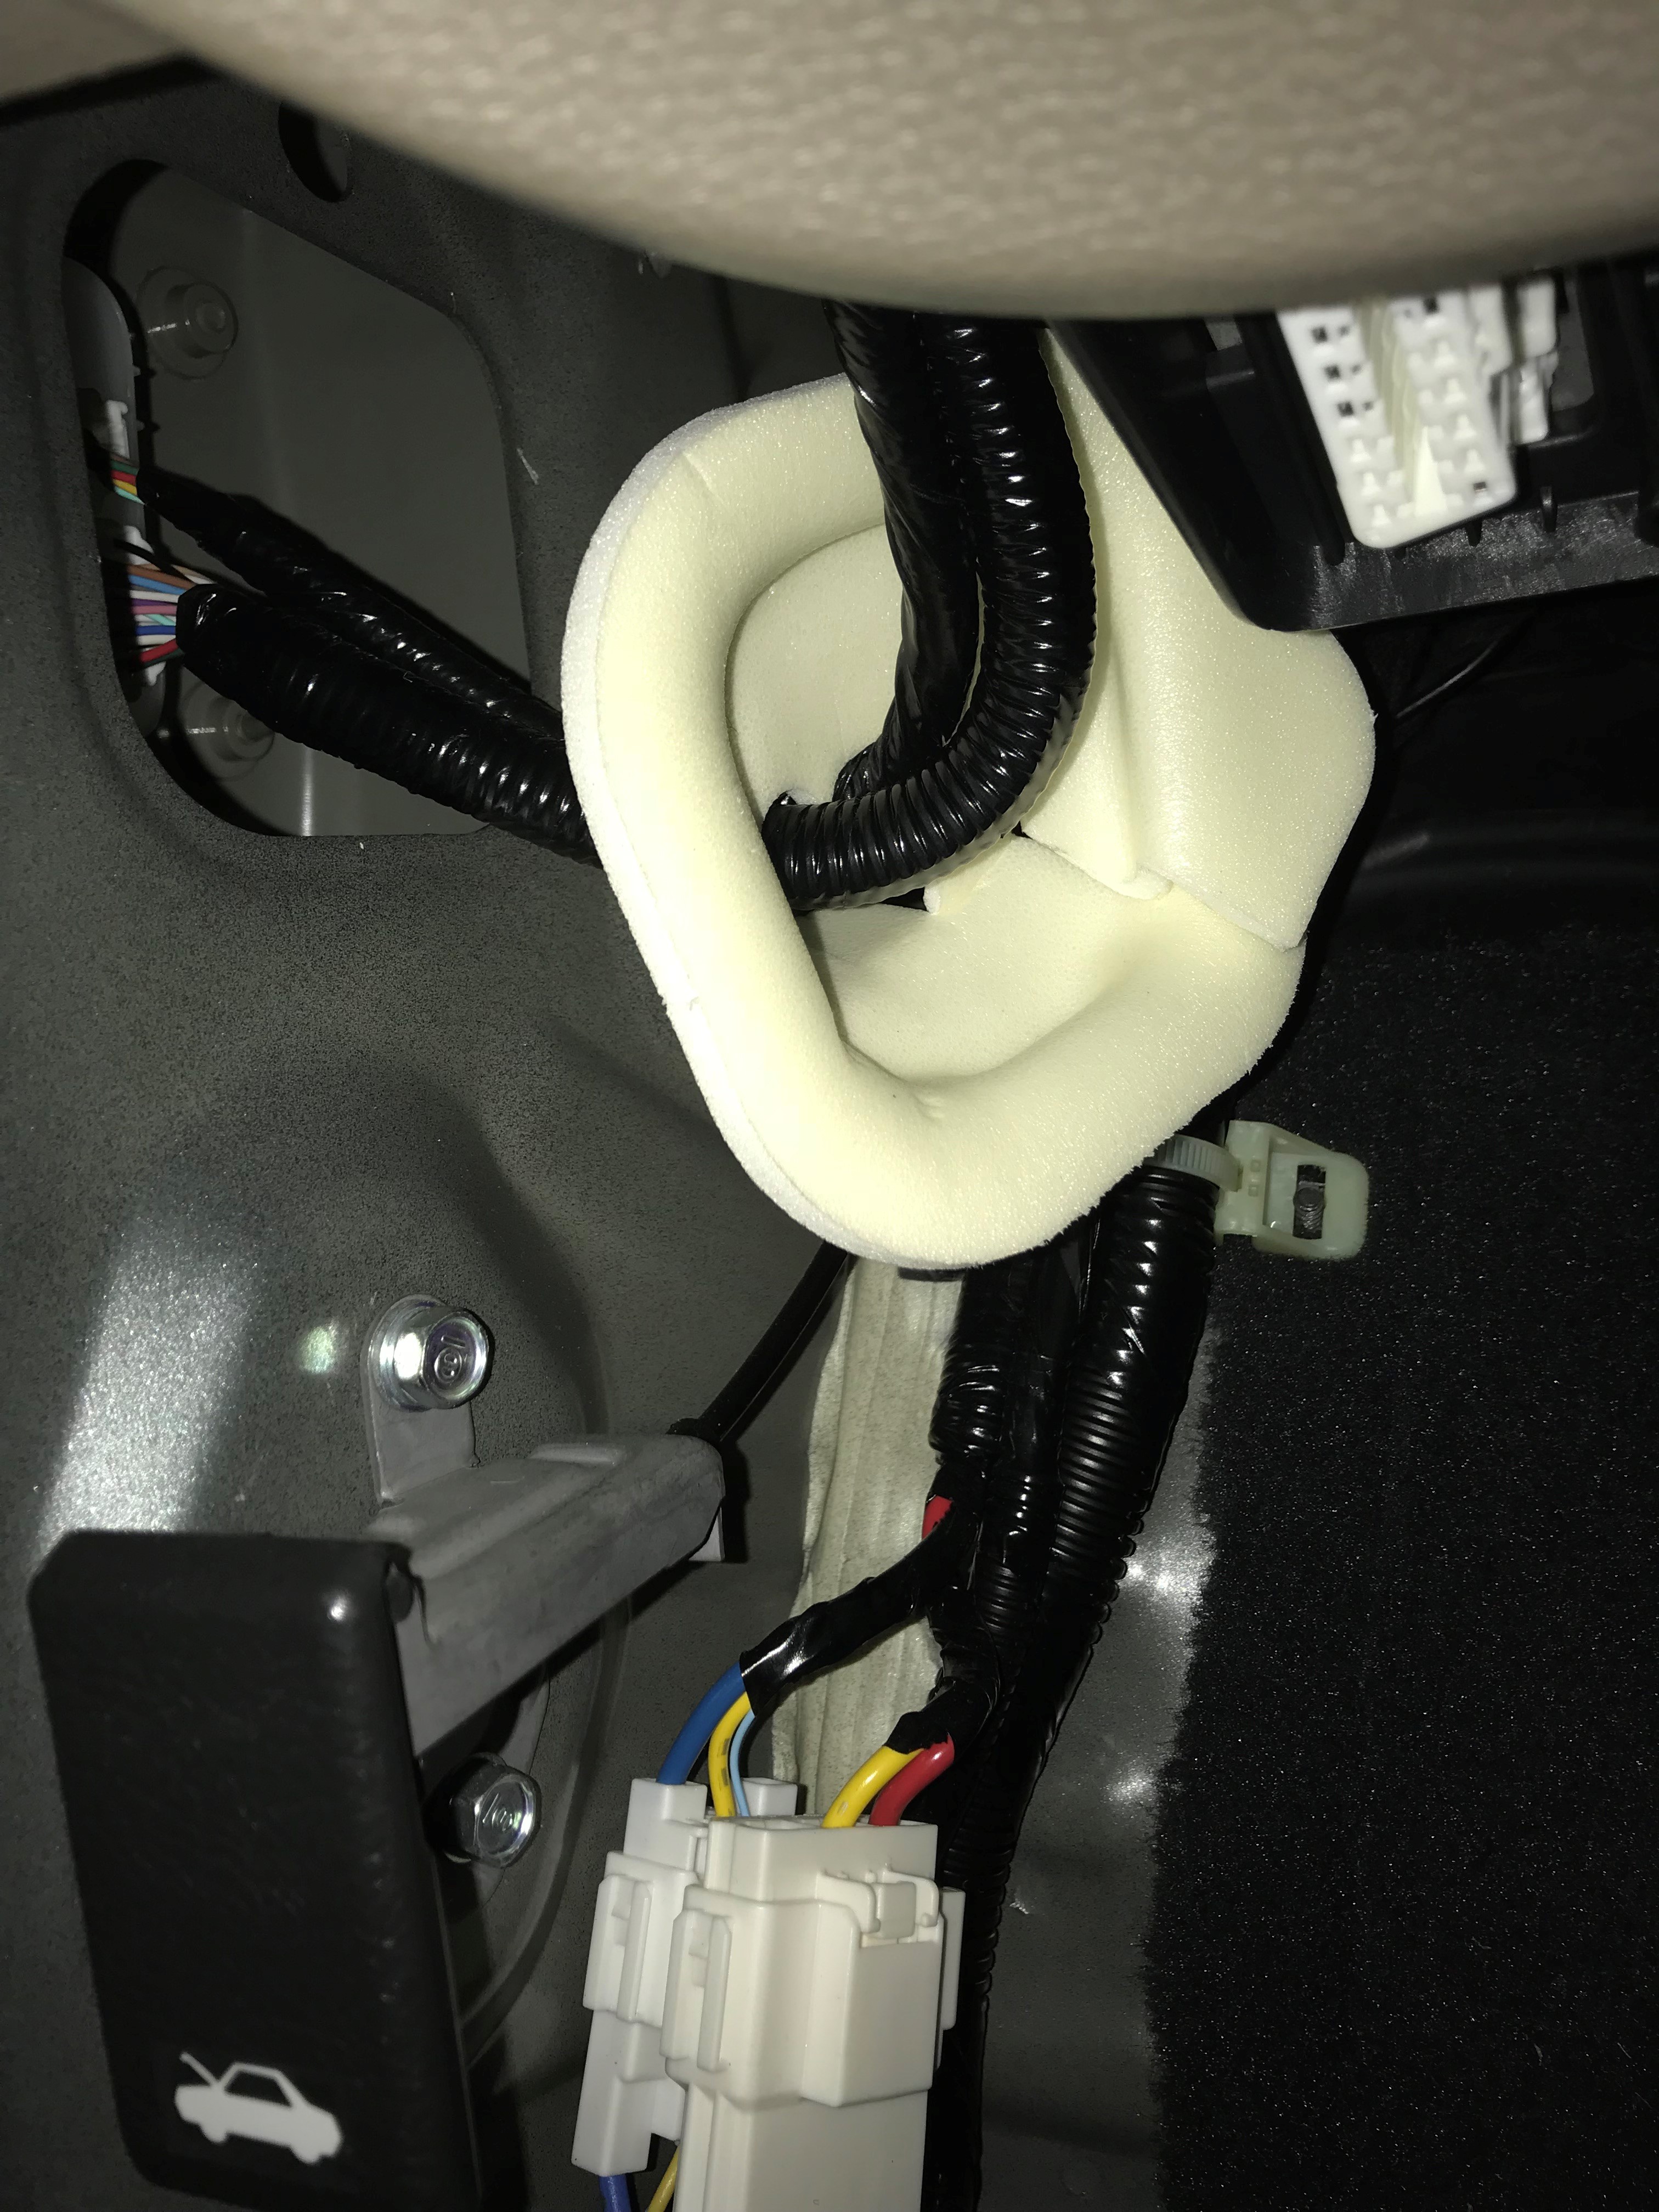
Add ground connectionRemove the drivers side kickplate. To do this, loosen the bottom door sill enough to remove the side moulding enough to loosen the kickplate. There are two tabs you need to pry out and then while pulling the hood release latch horizontal, slide the kickplate out of the way. On the metal vehicle body is a grounding nut, seen in the very top of this photo after the kick plate has been removed. Loosen the nut and attach the black "cross wire" as described above. For the connection I used a ring connector which I cut off part to make it U shaped, though it's possible to remove the screw completely and perhaps thread it on.
Remove drivers door panelWith driver window down, remove two cover panels to reveal 3 screws. Two screws are behind the door open/close lever and the third is under the armrest area. With the three screws removed, beginning at the bottom pry the door panel off and eventually lift up and out near where it reaches the window. Holding the panel, release two wire harness connectors and slide the panel forward to slide the locking mechanism out of the door. More details in video. 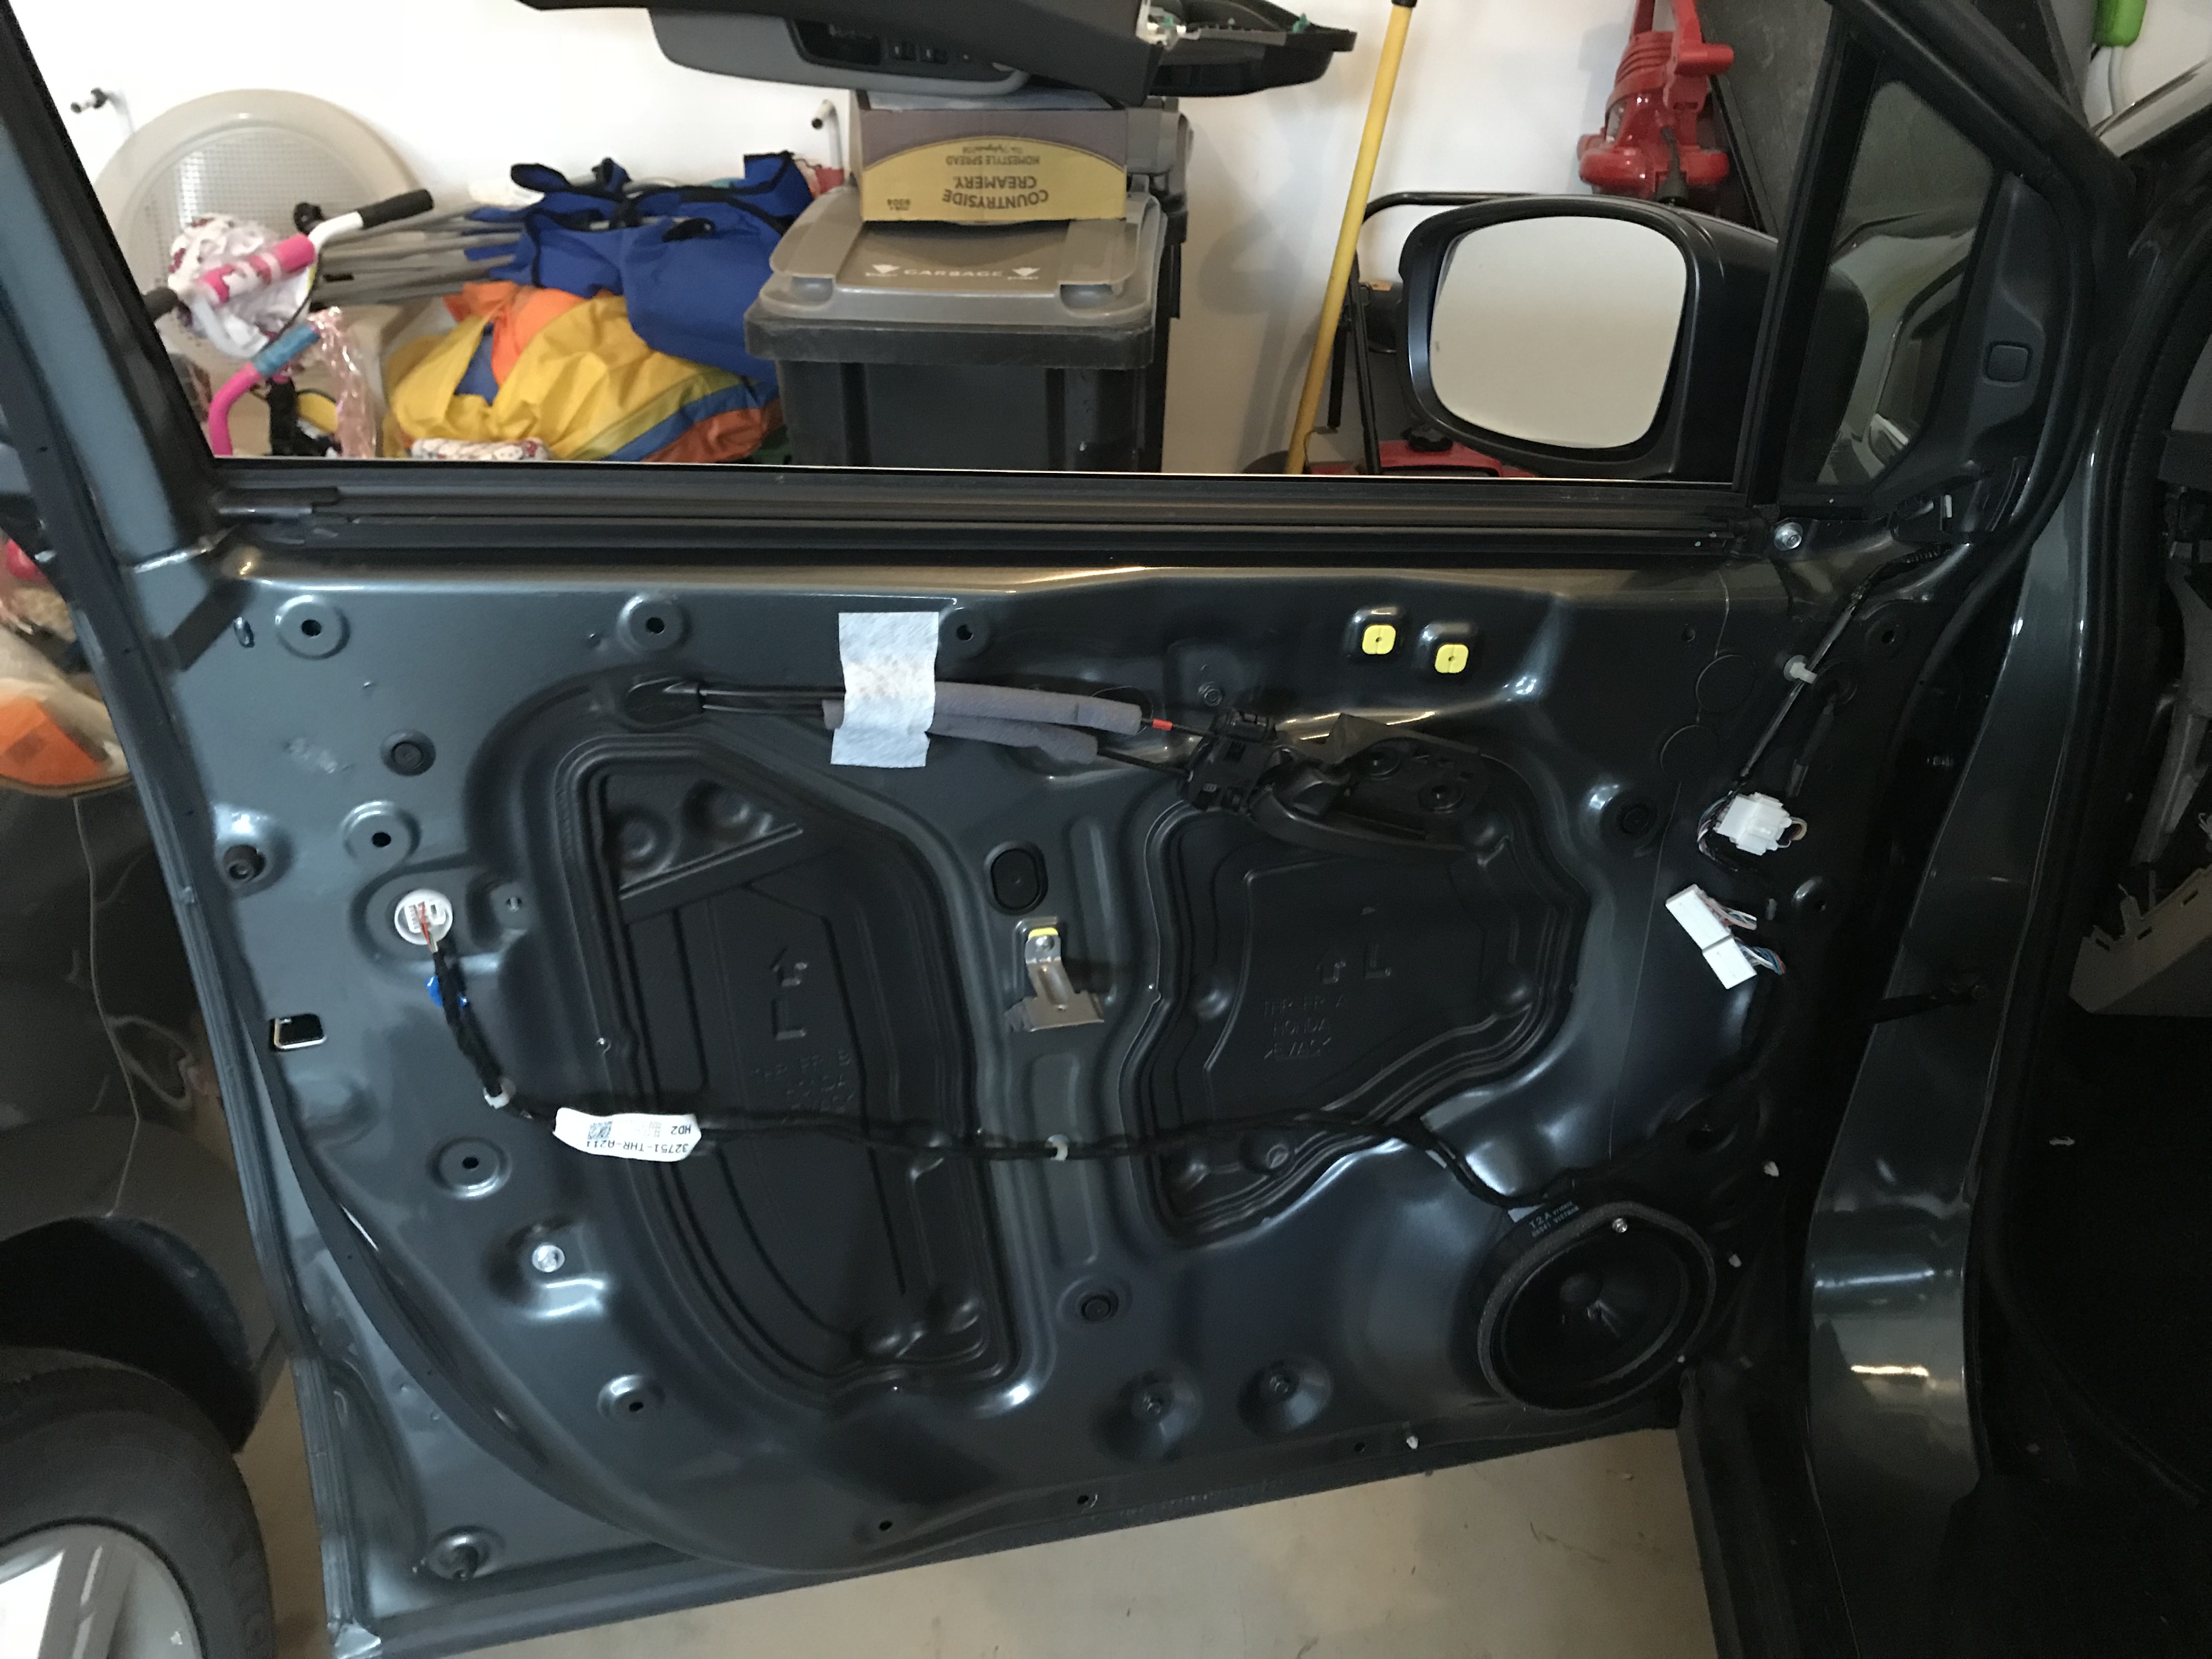
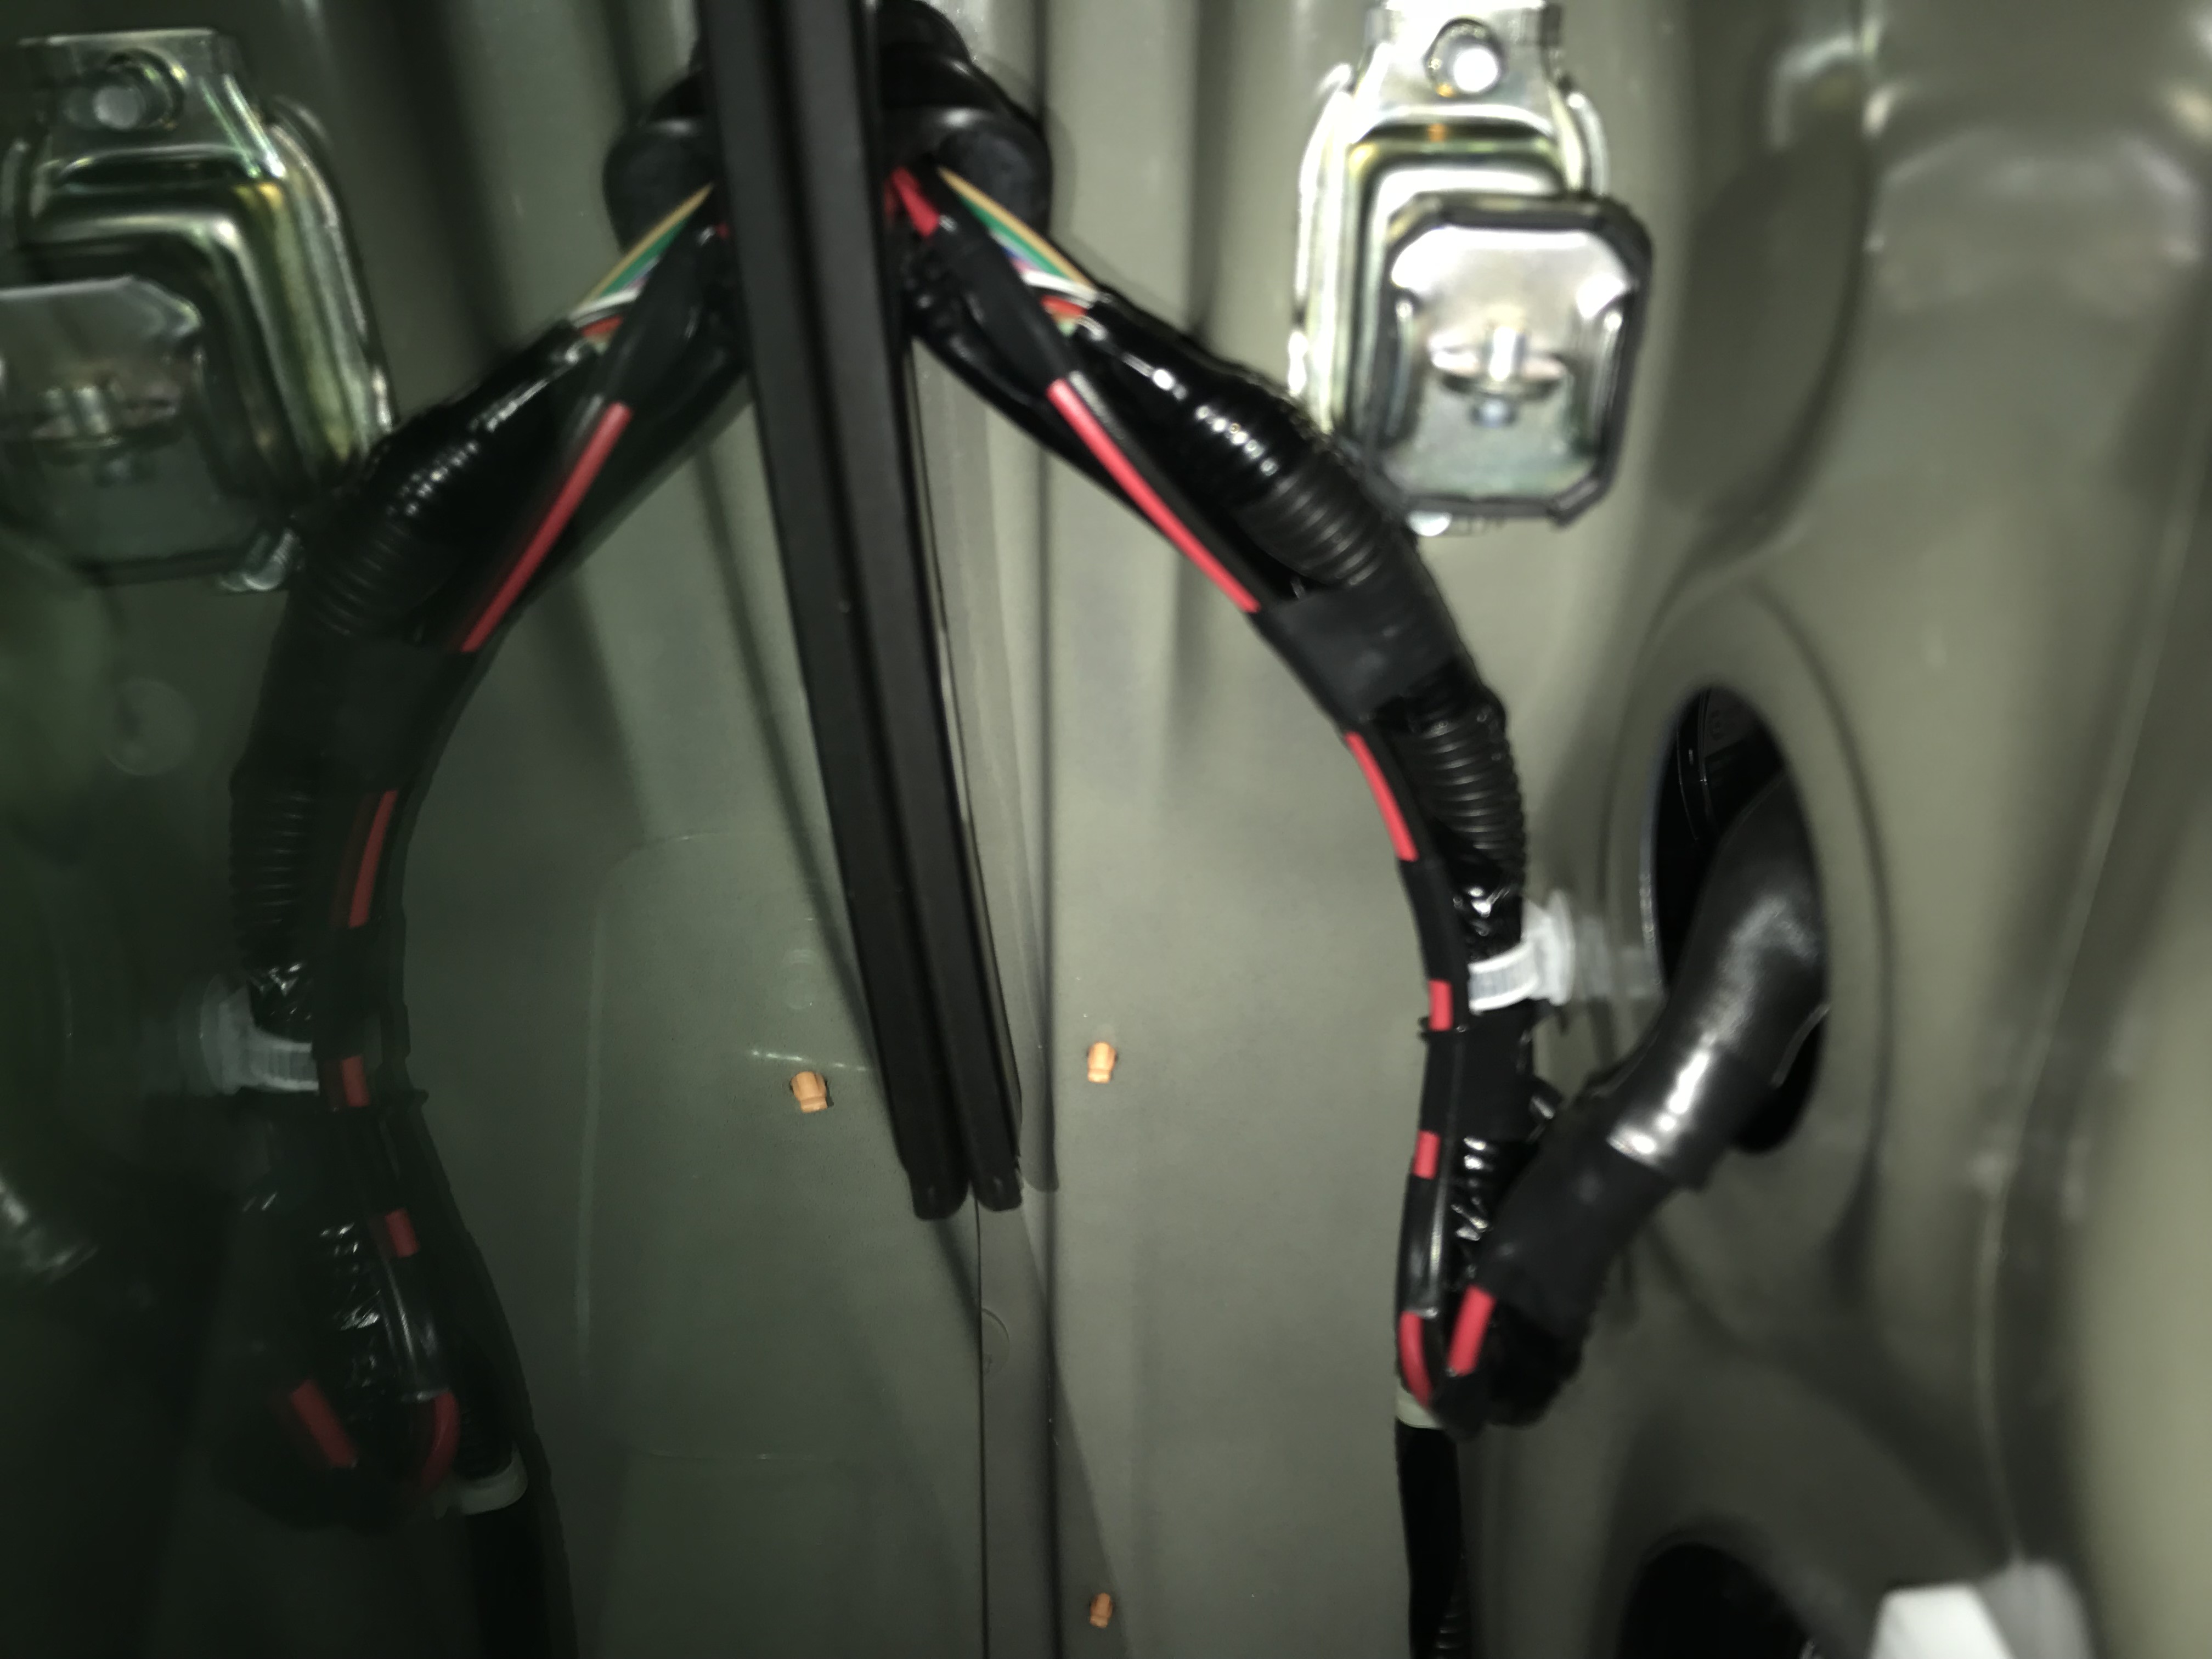
Fish wire from under dash to near mirror connectorThis is probably the most difficult step as it requires fishing two cables in tight spaces from under the dashboard, out into the inside of the door, and then out to the front of the door before terminating near the mirror wiring harness. Remove both sides of the black wire loom (black rubber connect which protects wires from the elements) on the door and car side. This might not be entirely necessary but helps get the cable through. Remove the front water shield from the driver-side door. There's an outline of sticky / spray foam that you can pry off with your fingers. Starting inside the door, poke a 14 gauge wire through the wire loom opening and through, pulling out near the driver side kickplate. This is not easy and took awhile. Once one wire is through, use it as a pull wire to pull through the second wire by duct taping the end. With the end of a wire sticking out the door, thread it through the pear-shaped black rubber gasket inside the door frame so it comes out near the exposed part of the door with the rest of the wires. Once one wire is through, use it to pull the second wire by duct taping the end of the second. Once both wires are through, pull them so the wire is appropriately the same length as the wire harness that's already inside the door. Use some duct tape to tape the two new wires to the existing wire bundle. If the black wire loom was disconnected from either door or car side, reconnect by finagling it back on. I needed a helper to apply pressure to push the white plastic cable connector from inside out towards the door so I could get the black rubber wire loom back on. 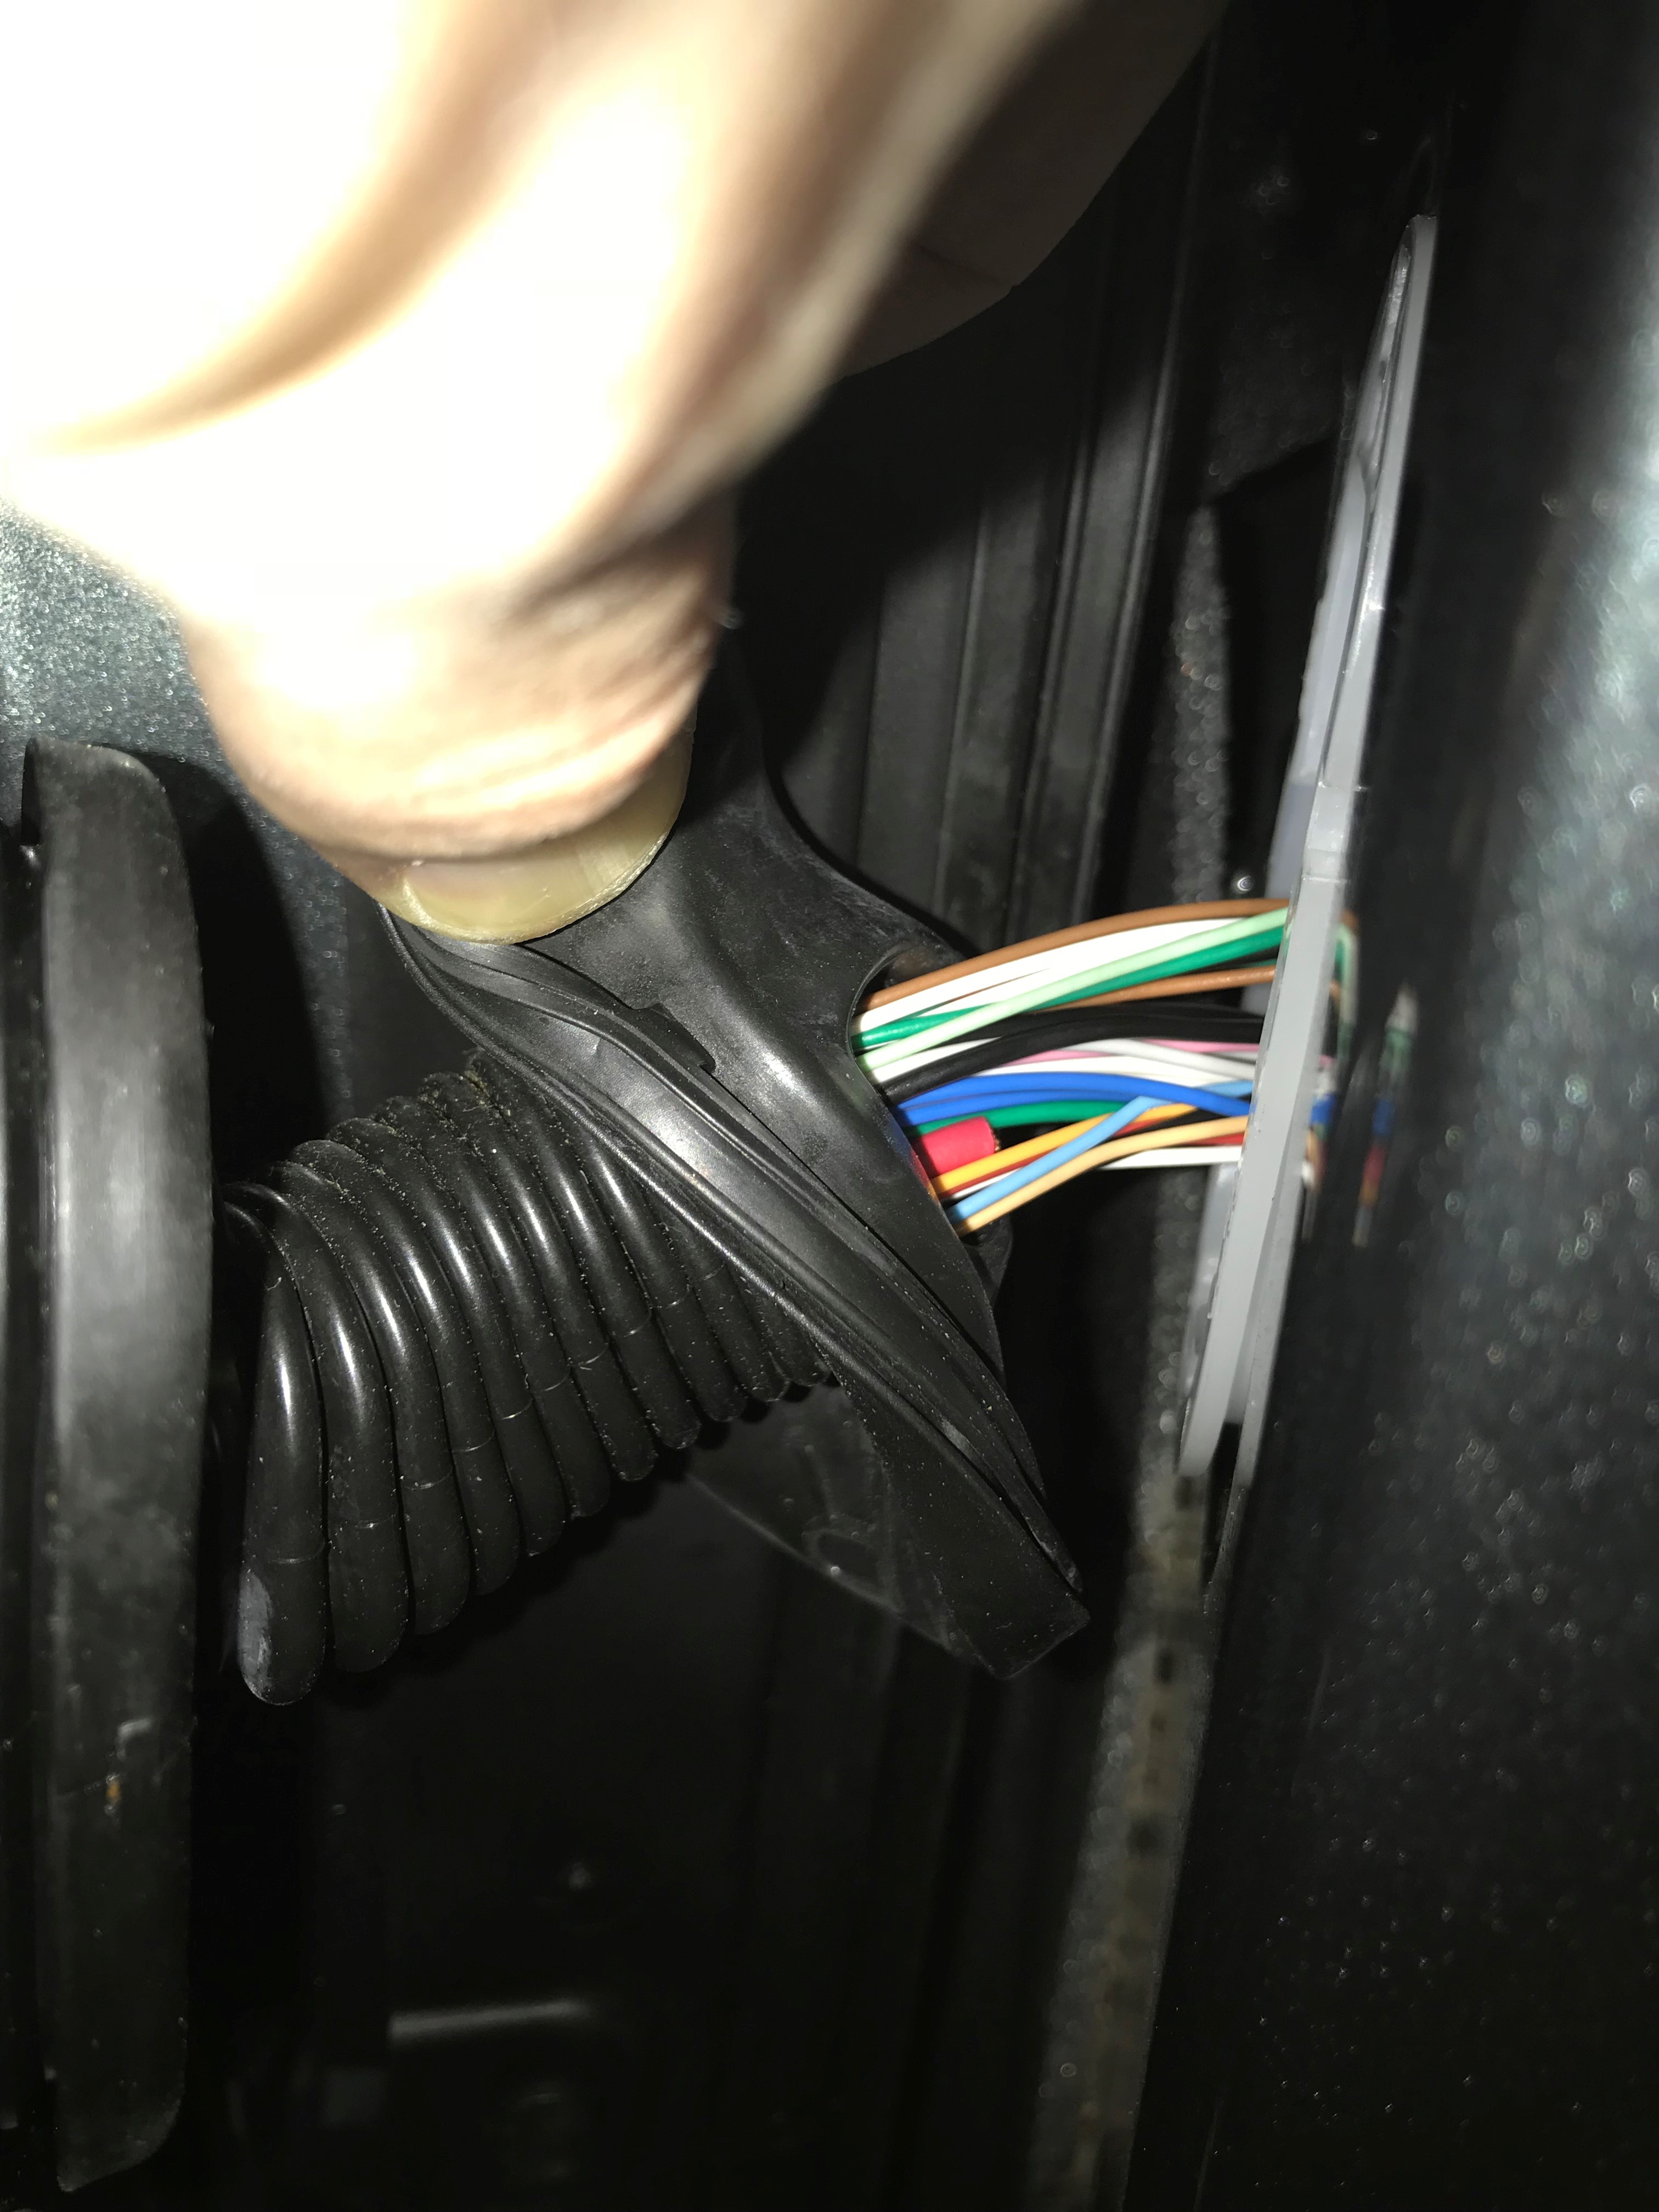

Before / after pictures of inside the door: 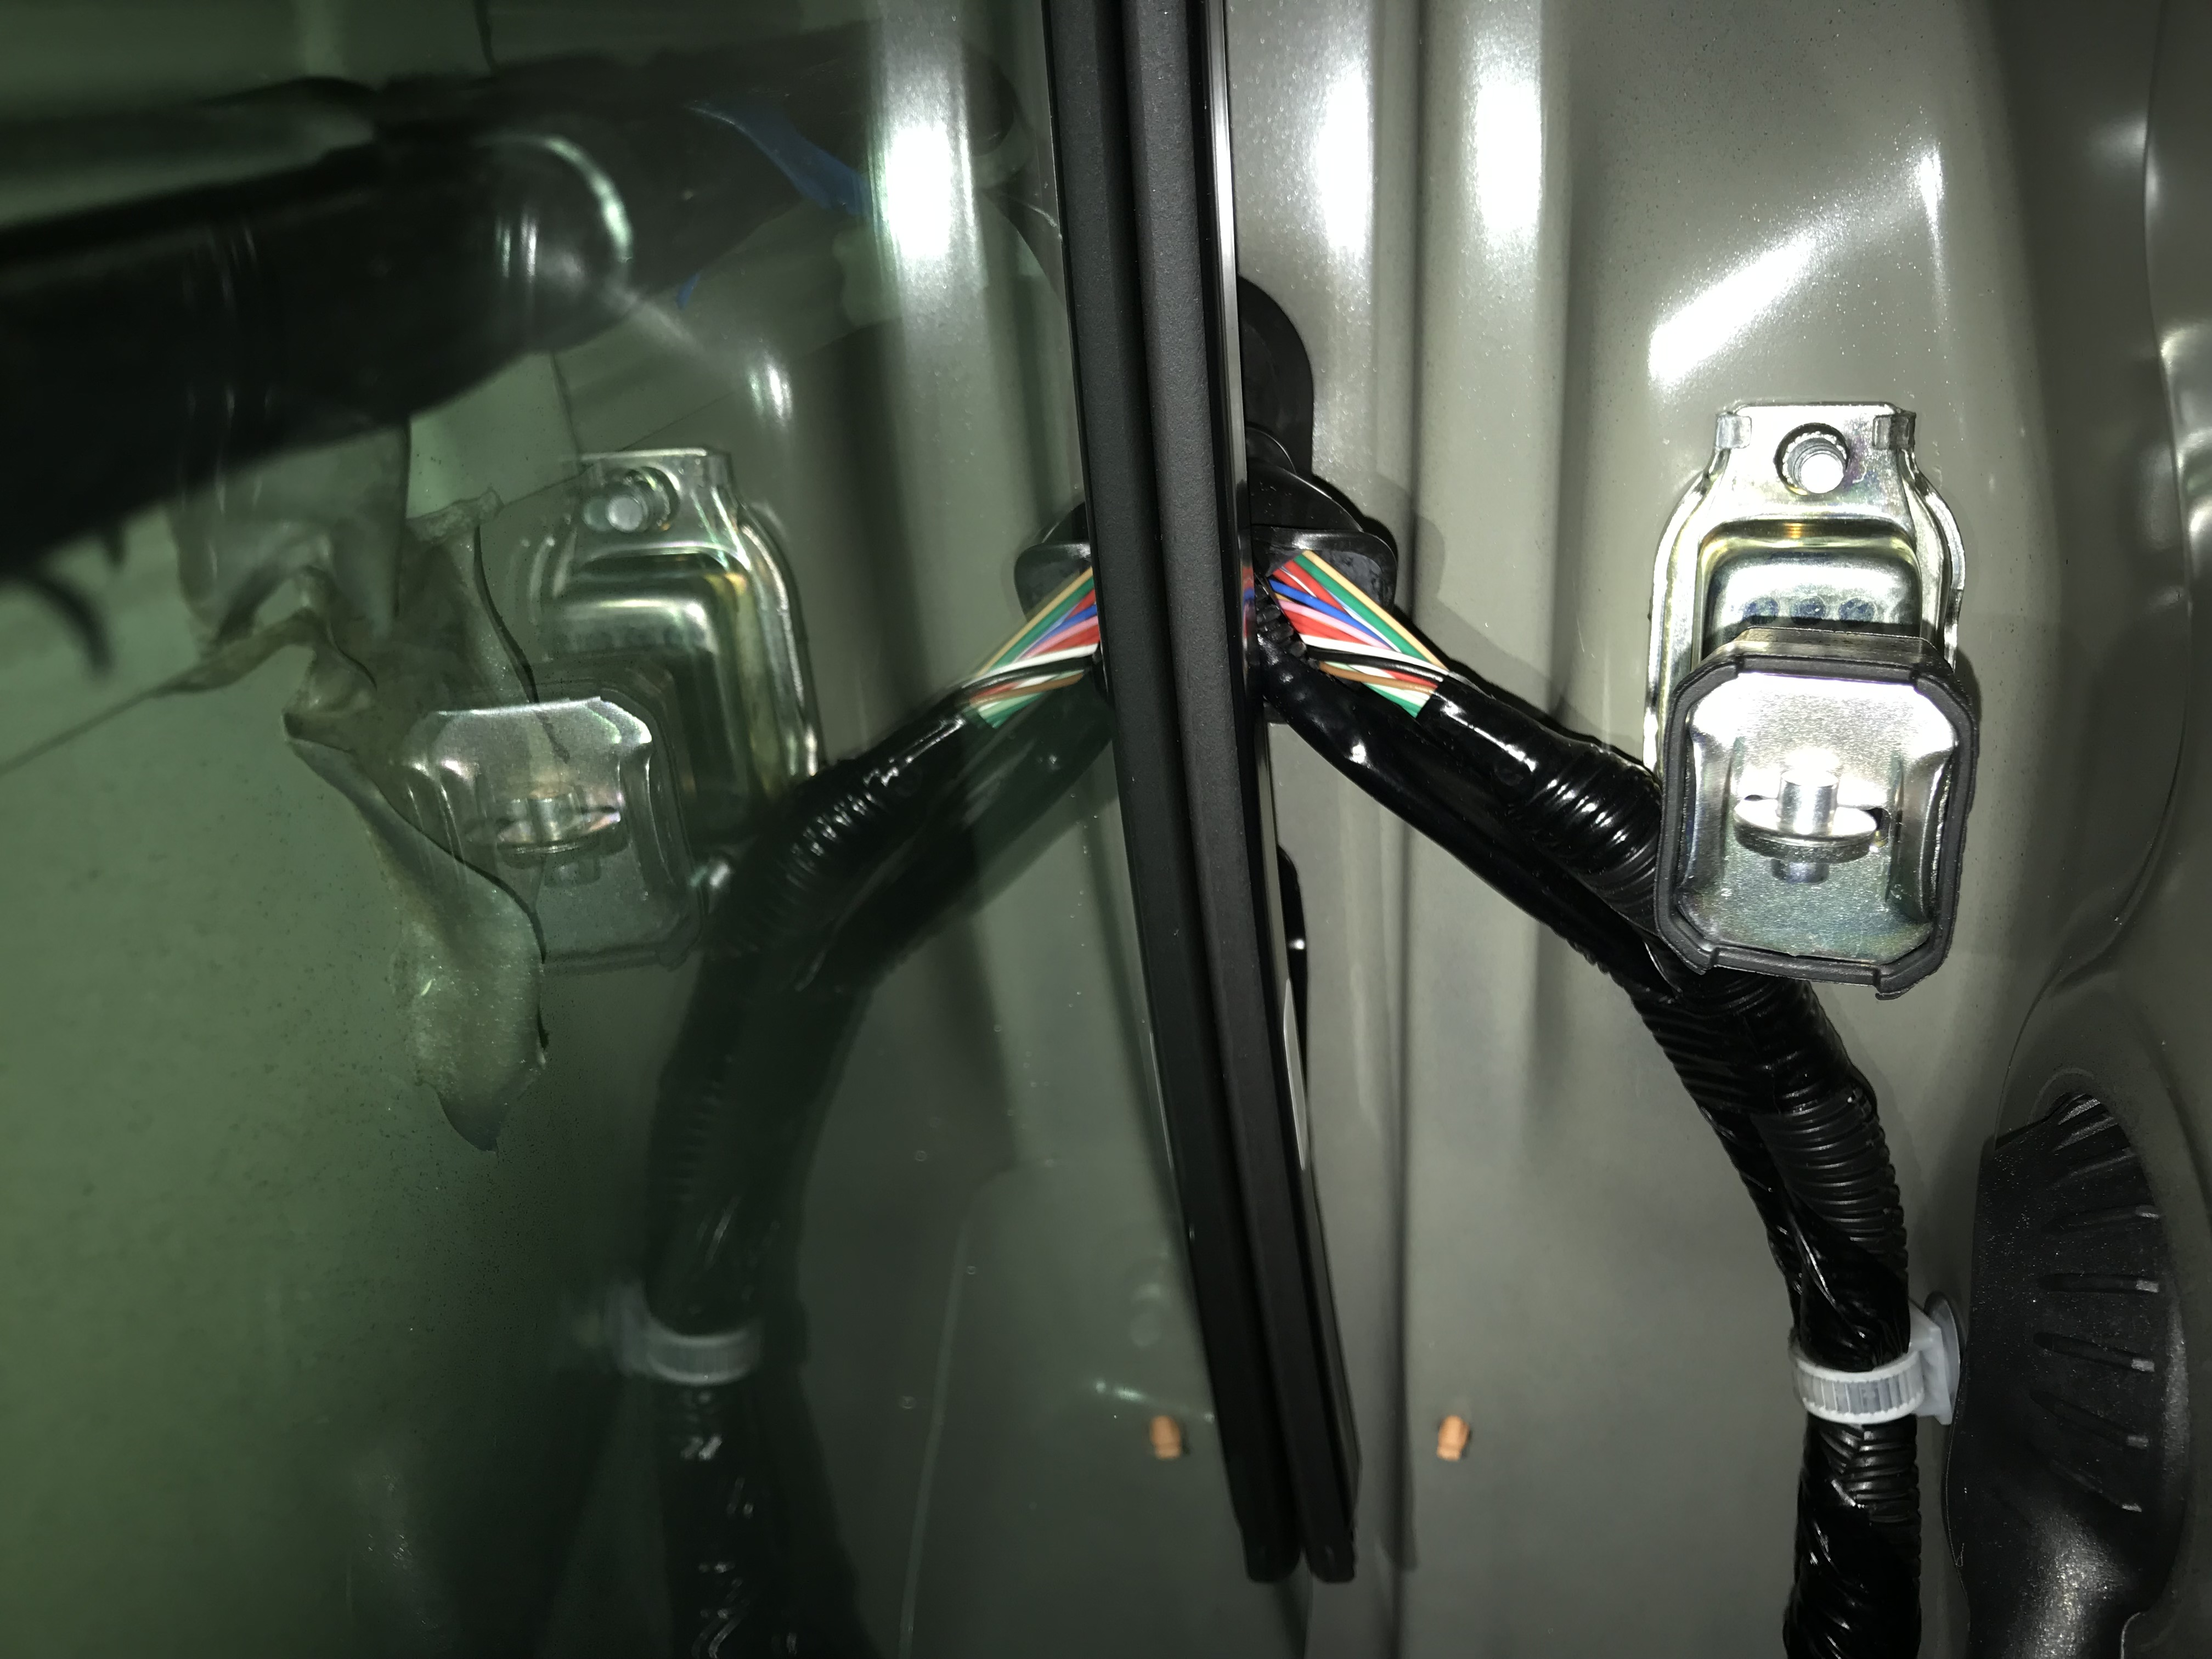
Remove the mirrorDisconnect the mirror wire harness connector. Remove two black circle disks and push out the mirror harness gasket circle. Behind the three openings are three 10mm screws. Using a 10mm socket plus extender, carefully remove the nuts and avoid letting them drop inside the door. Make sure someone is holding the mirror before the final nut is removed. Pull the mirror connector out. Modify the mirror wire harnessThe mirror wire harness purchased for this project will be modified to instead of plugging into an Elite-trim door wire harness it will instead connect to the two red / black wires fished from behind the dashboard. Remove or cut-out two wires from the "elite" mirror writing harness connector: These can be removed by using a tiny flathead screwdriver and inserting it through the front (connection side) while gently pulling the wire from the rear (wire side). Once the two wires are removed, strip and crimp them to two blue circle male connectors from the quick connect kit. 

Run the elite mirror wiring harness through Elite mirror sub-assembly. All the connectors need to go through the small circulator opening (note that the Elite sub-assembly opening smaller than non-elite as shown in pictures) and not based on cable length. The circular turn signal is the biggest so that needs to be pushed through first, followed by the long/narrow mirror position adjustment connector, followed by the remaining connectors. 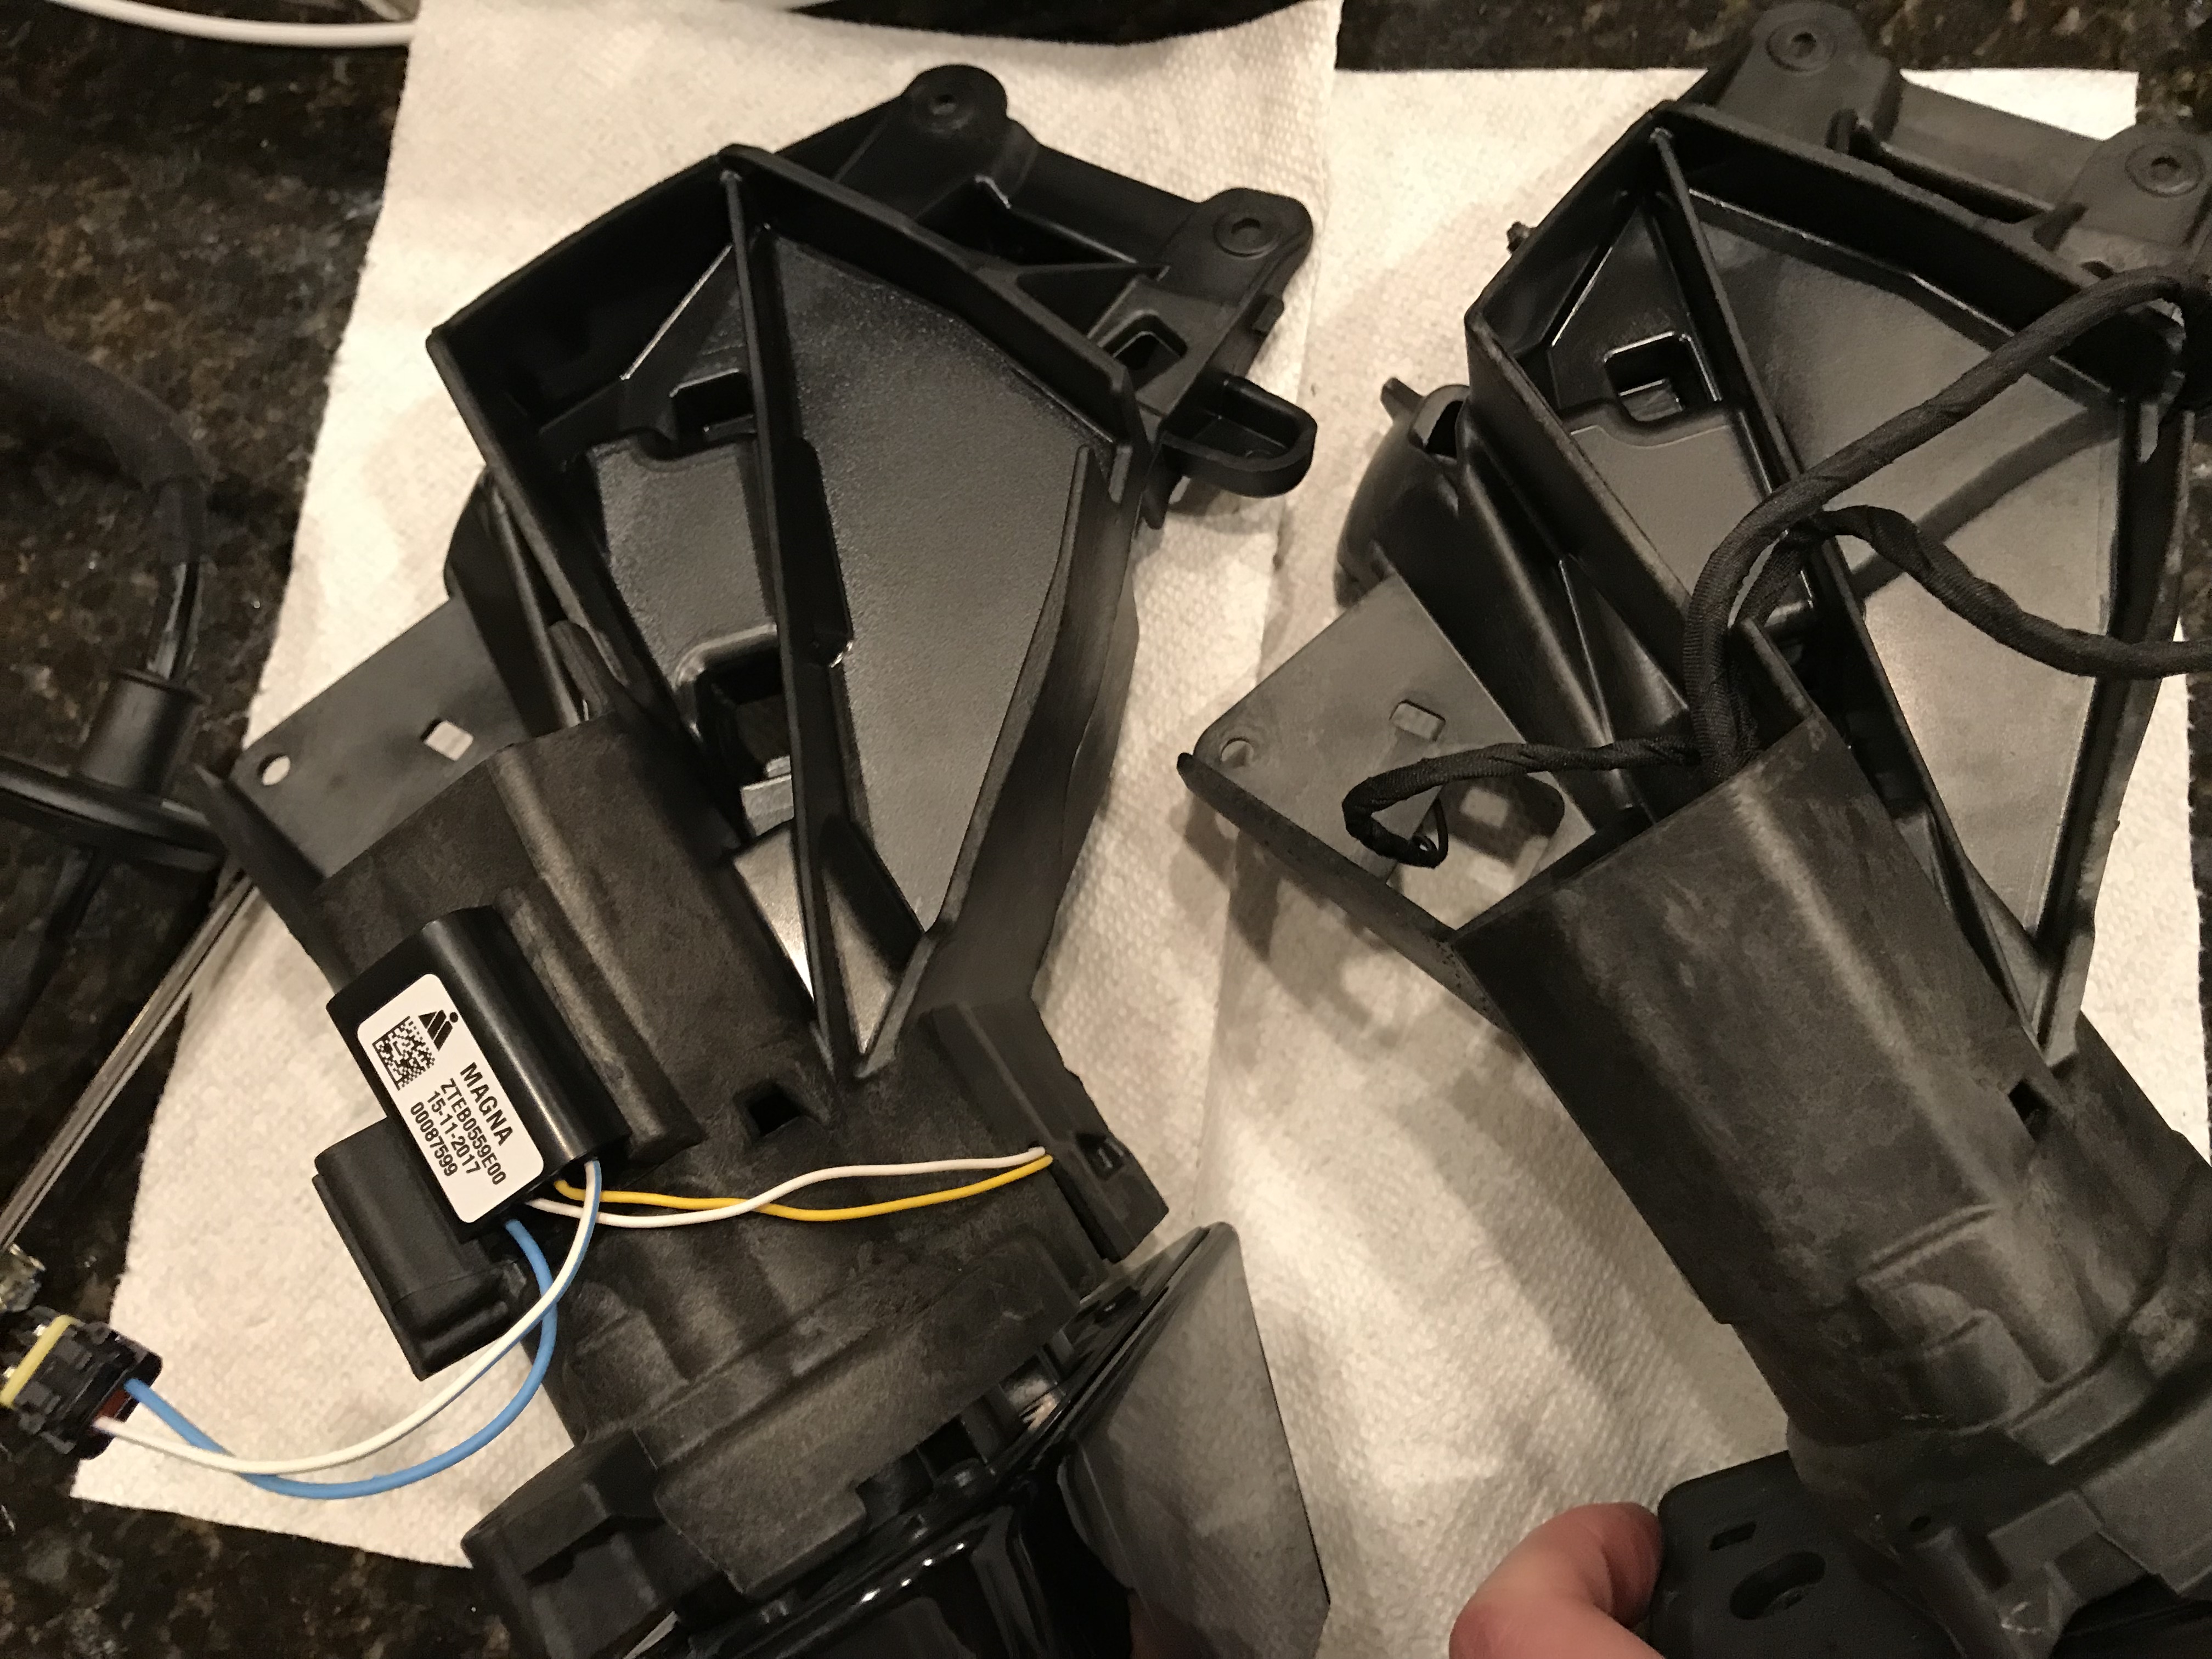
Upgrade the mirrorRemove the actual mirror / mirror holder by carefully pushing mirror in the upper right to create enough space to insert a flathead screwdriver into the lower left of the mirror. Once the flathead is inserted, rotate 90 degrees to create a gap and then insert another flathead screwdriver to do the same further along to expand the gap. Eventually the mirror can be carefully removed. Cut out side towards the two openings. Keep prying until you get the existing mirror housing off. It may be possible to separate the mirror housing without destroying the EX-L part but I wasn't able to figure it out and I didn't need the EX-L part after performing the upgrade. At this point there's no turning back. :) 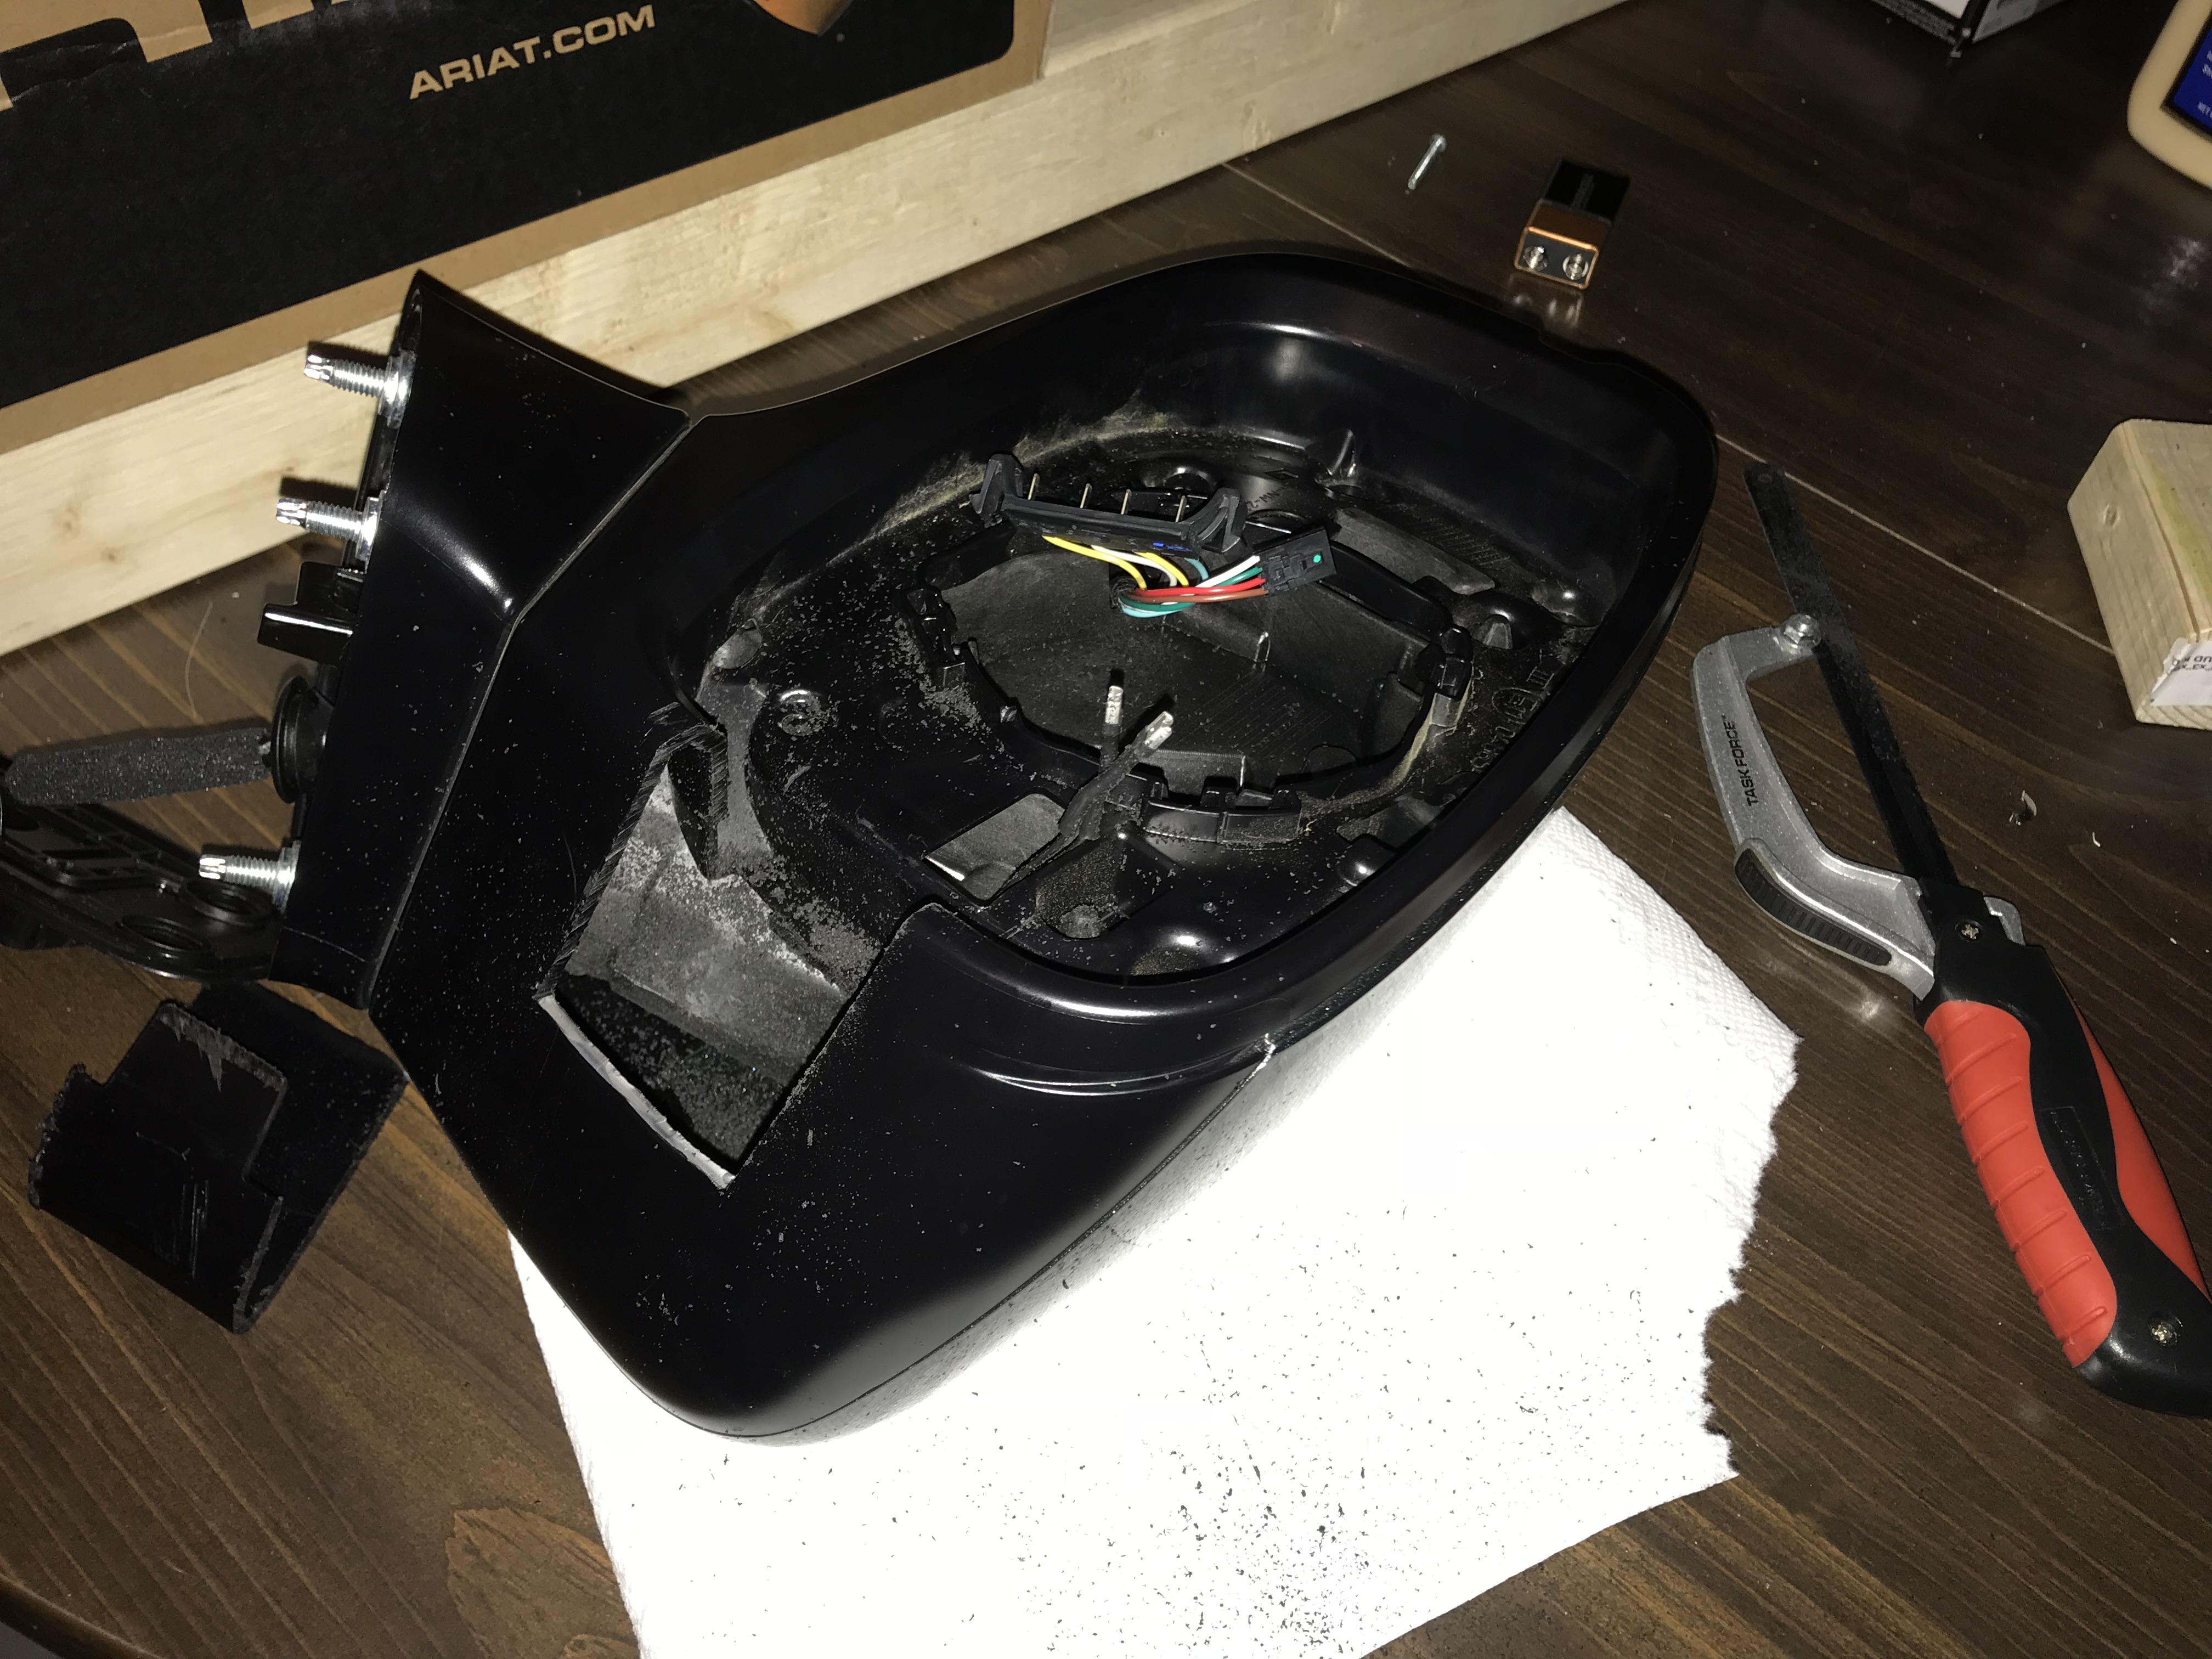
Attach the colored skull cap to the new Elite housing. The existing turn-signal should remain on the colored skull cap. Plug the circular turn-signal connector to housing. Insert the mirror sub-assembly to the skull-cap and attach with screws. Insert the mirror positioning part with screws. Attach connectors. Attach the power retract actuator connector and insert connector into holder. Attach bottom of housing to mirror base with two screws. You may need to rotate the mirror to gain access to the screw holes. Insert top of housing. Reinstall the mirrorFollow "Remove the mirror" in reverse. Push the black circles back in place. The existing adhesive seemed to be sufficient for it to stick. Push the mirror wire harness gasket into place. Connect the mirrorFrom the two (red / black) wires coming out of the door gasket, cut to length and strip and crimp blue female connectors. Use some zip ties to attach the wires to the existing wire bundle. 

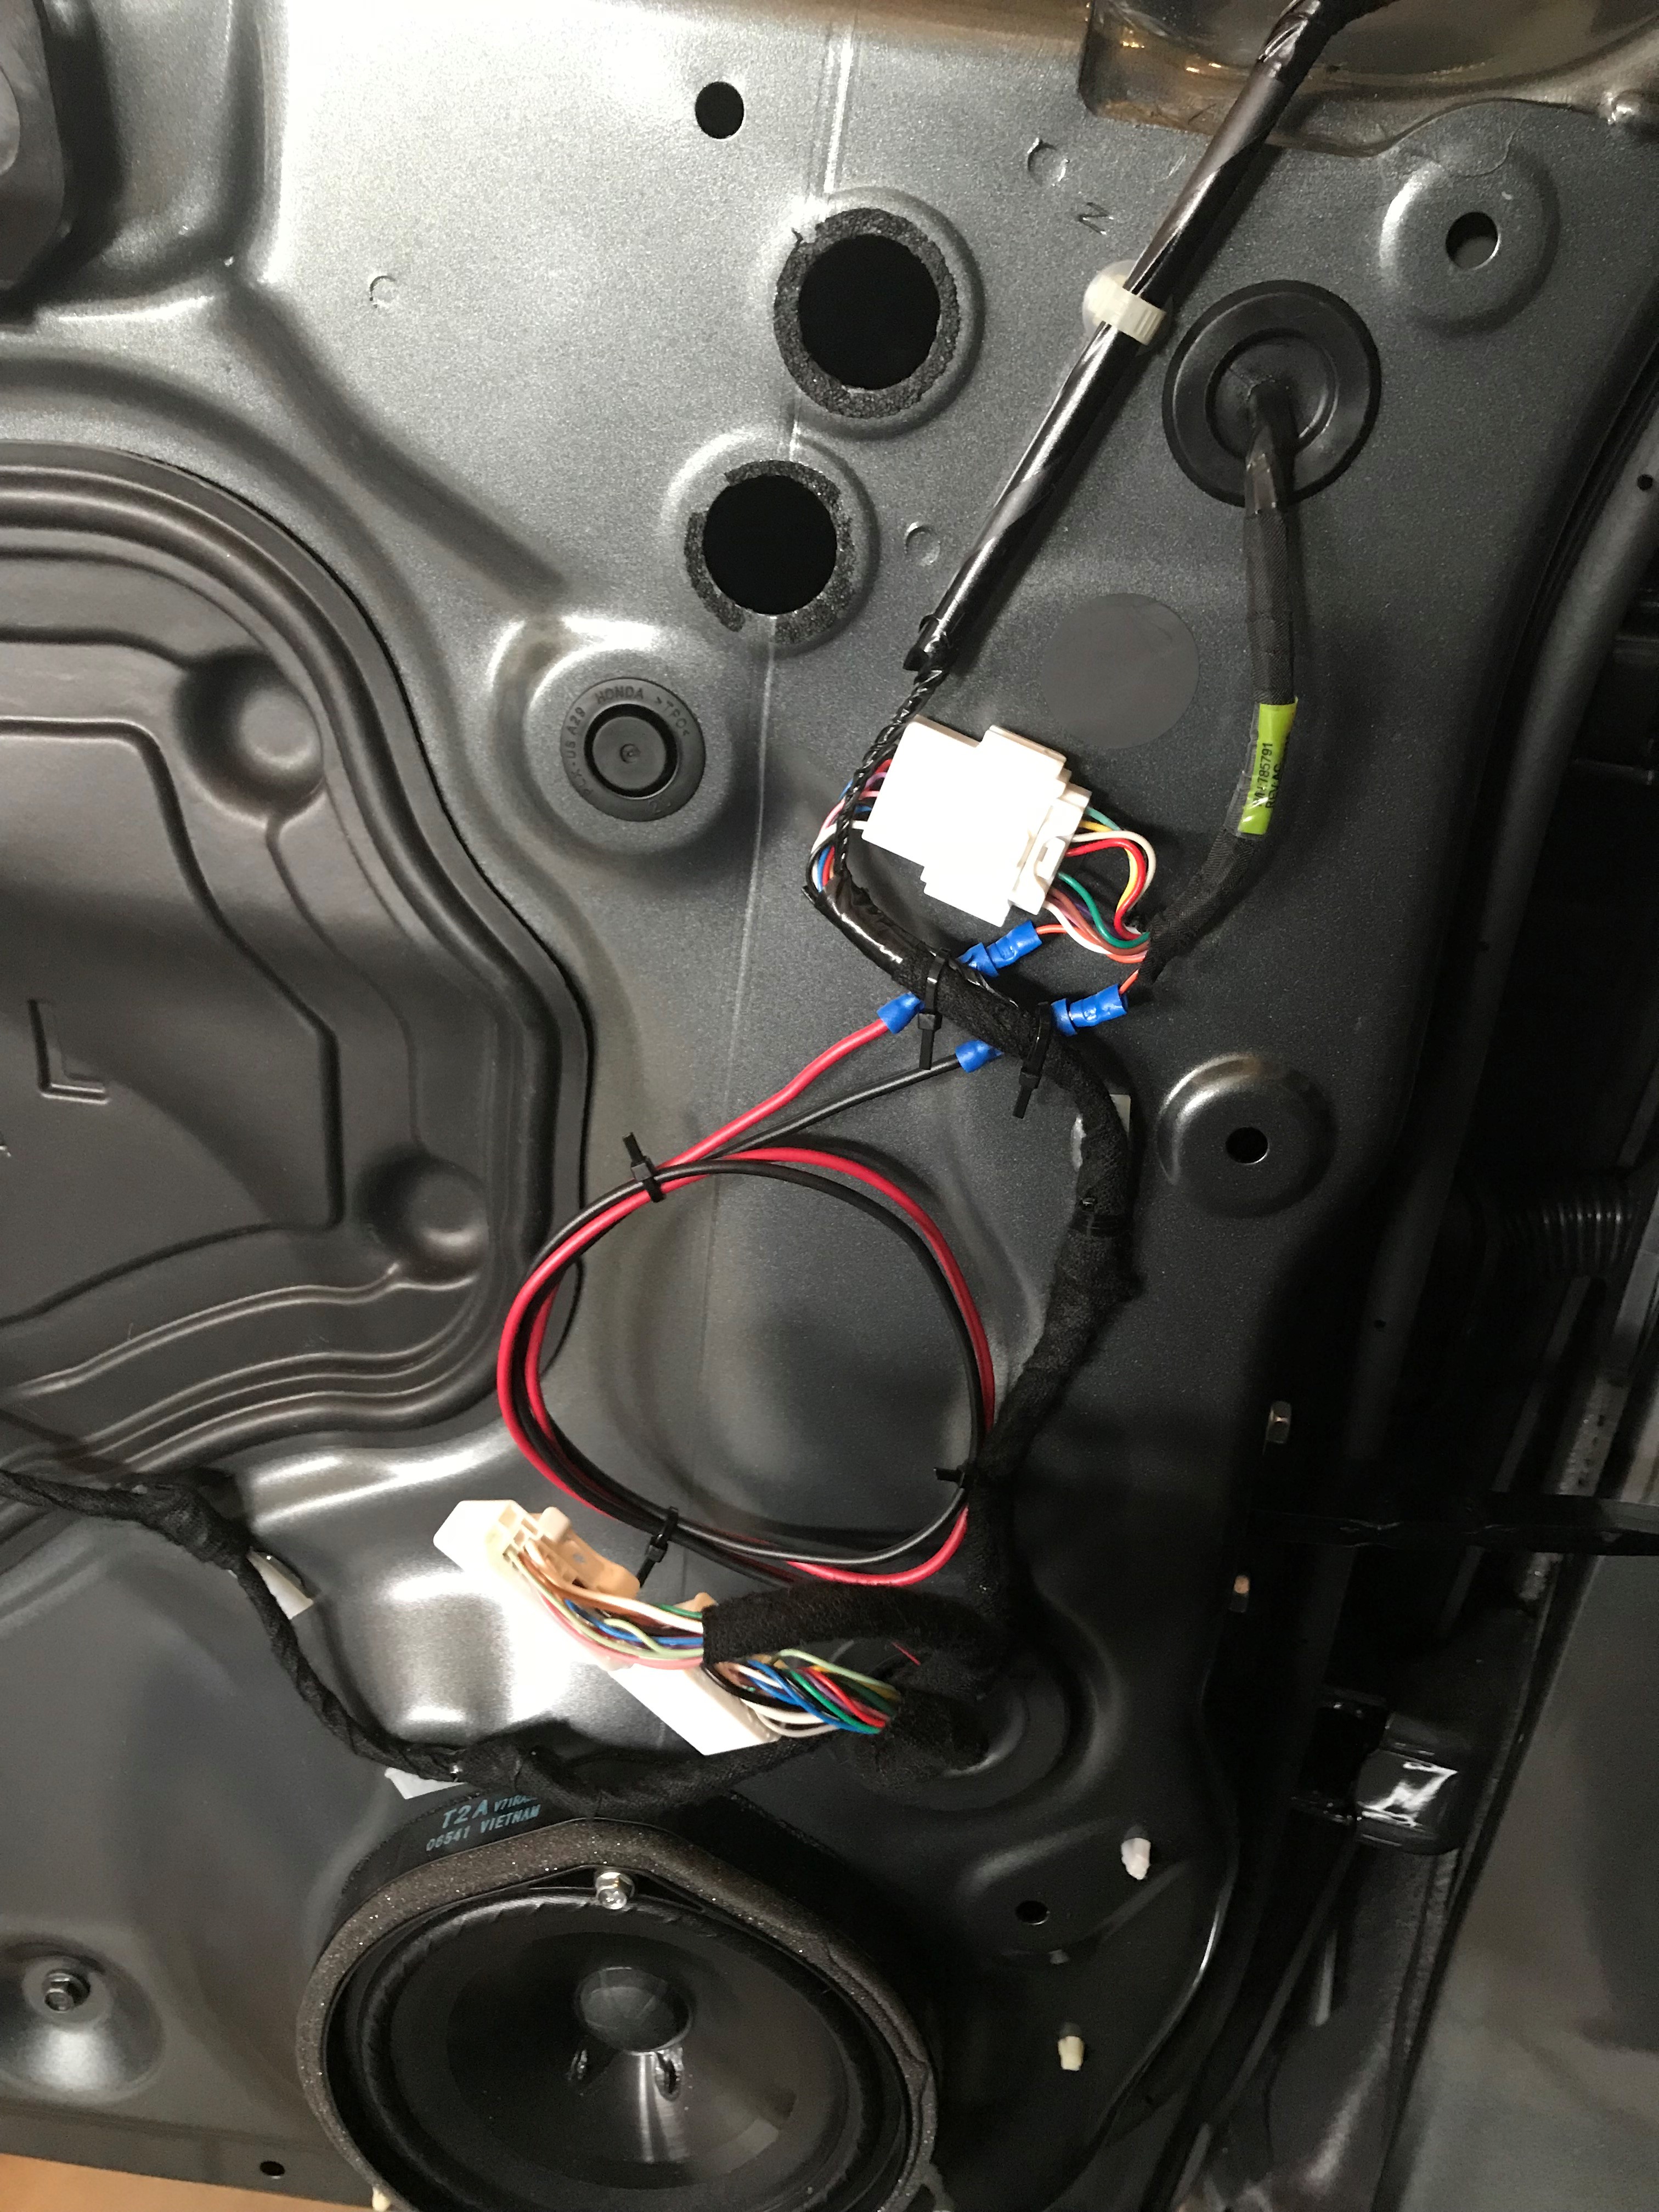
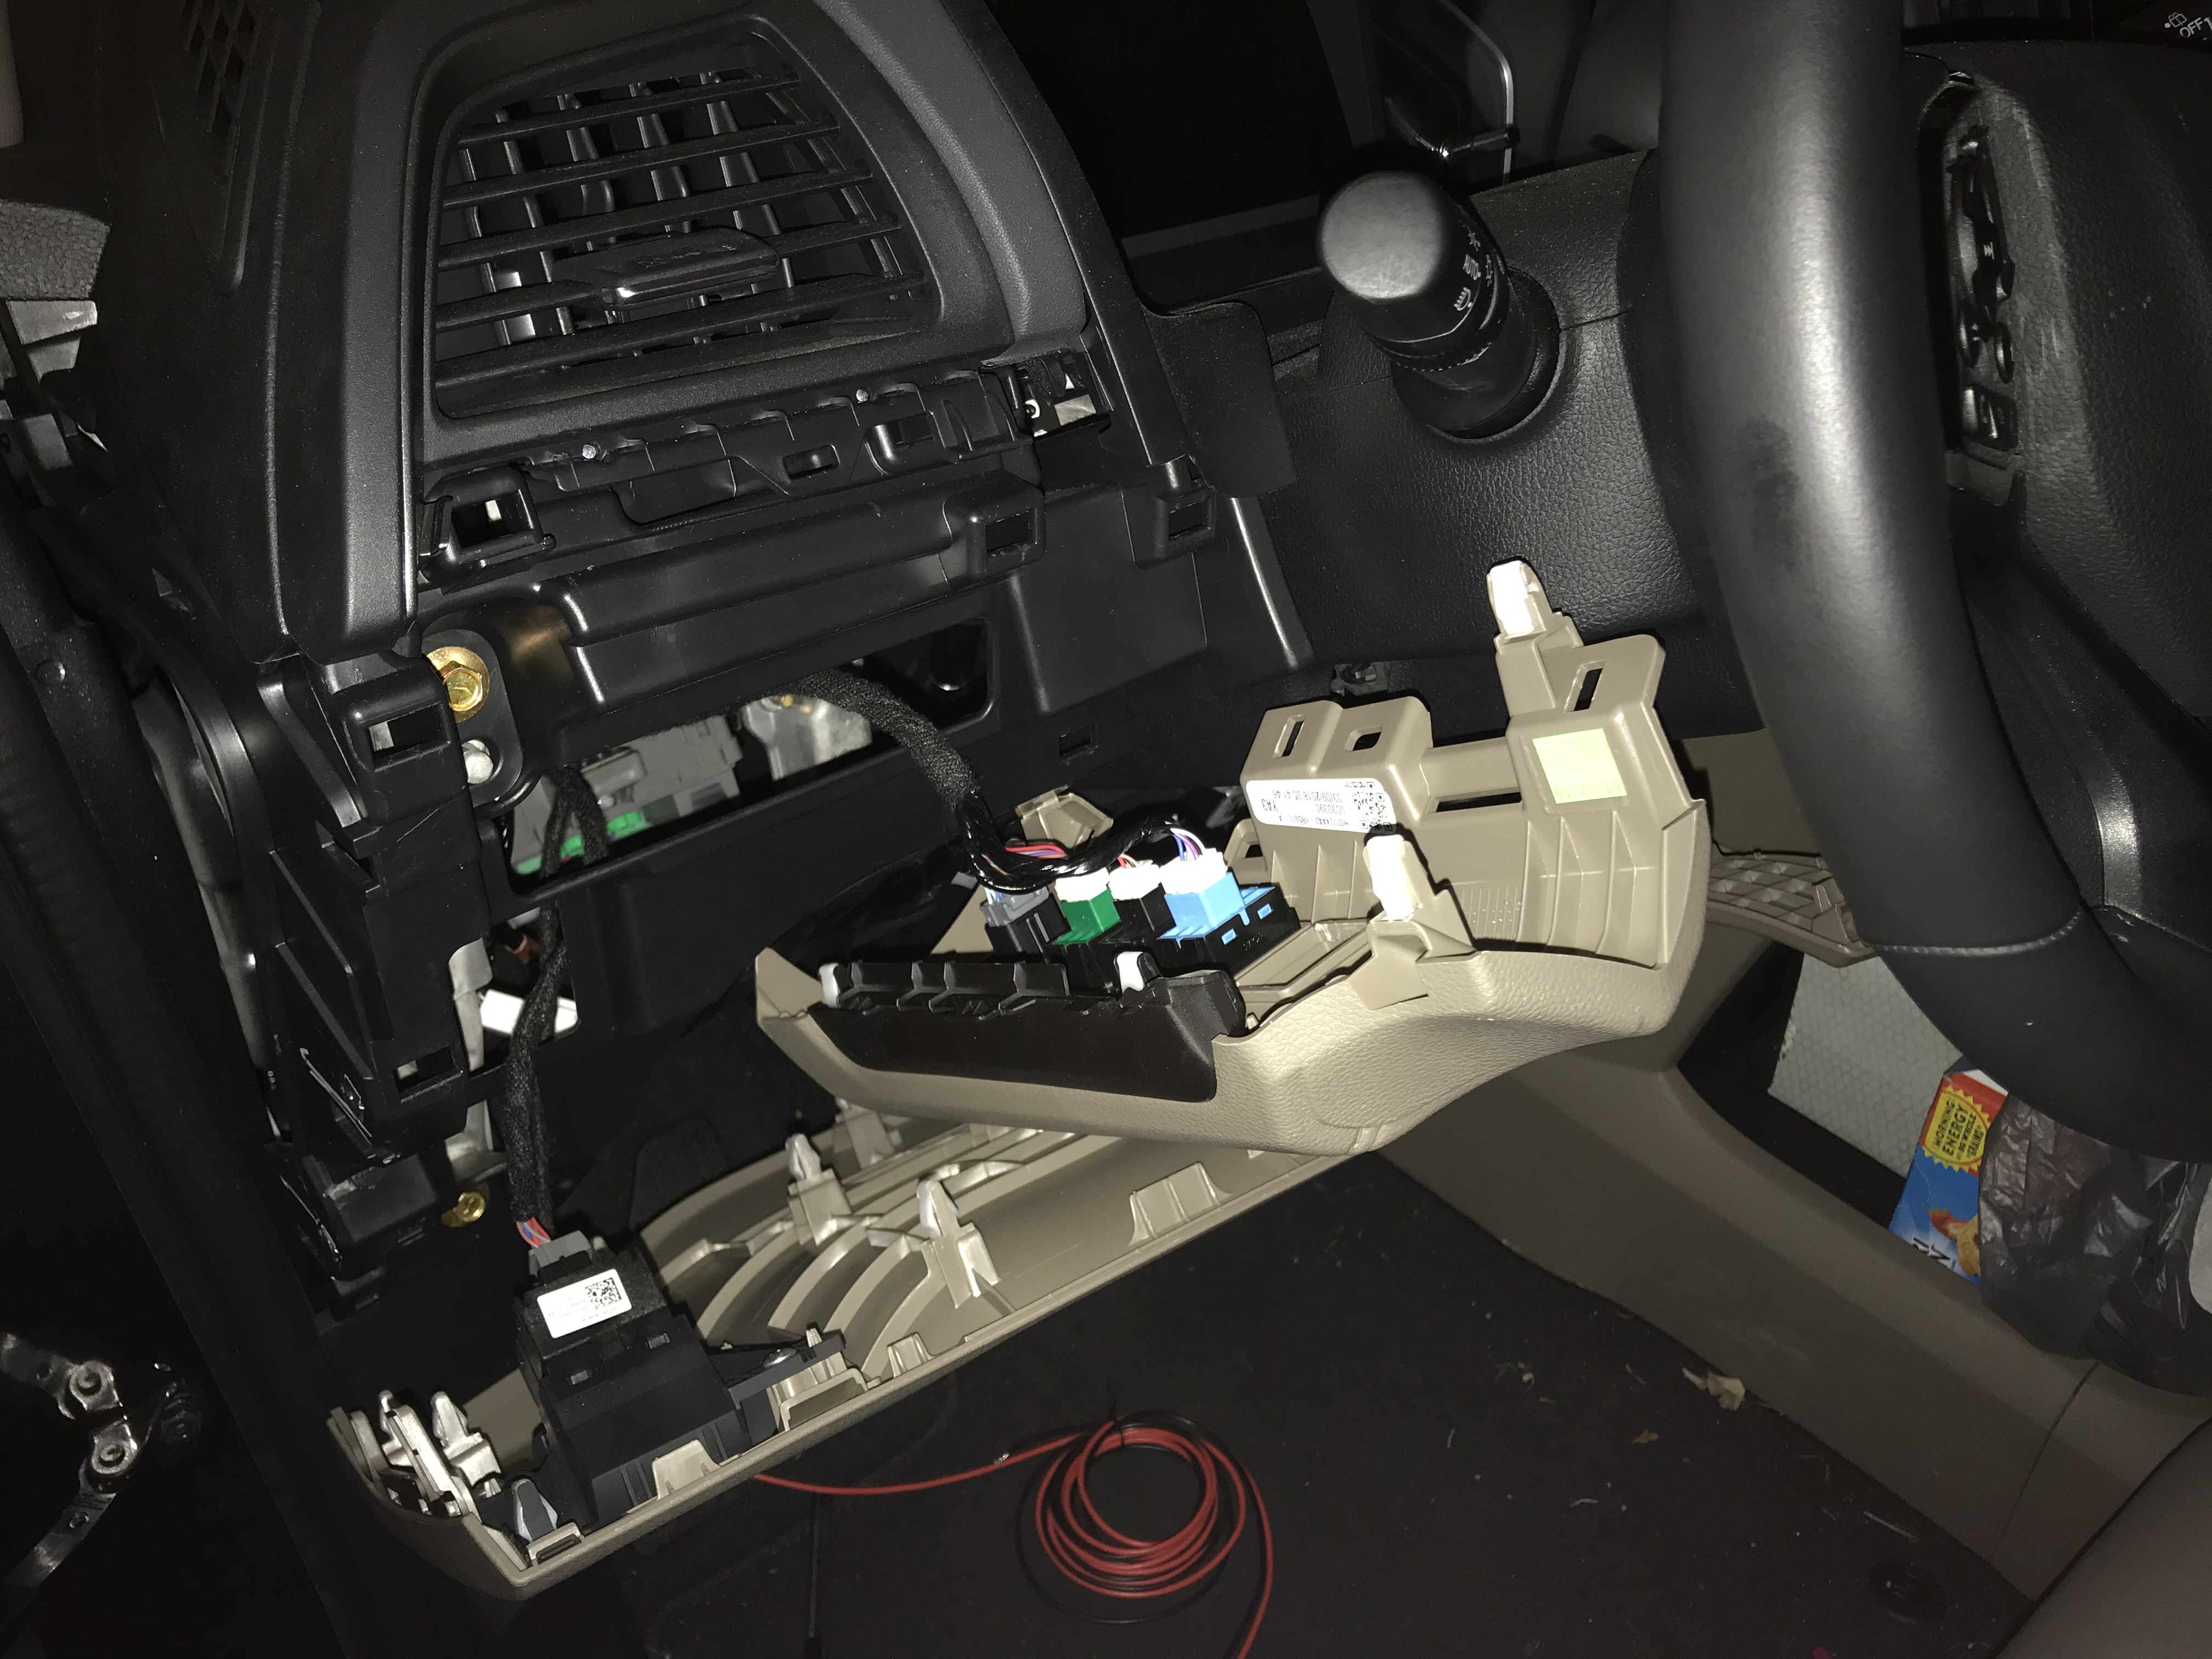
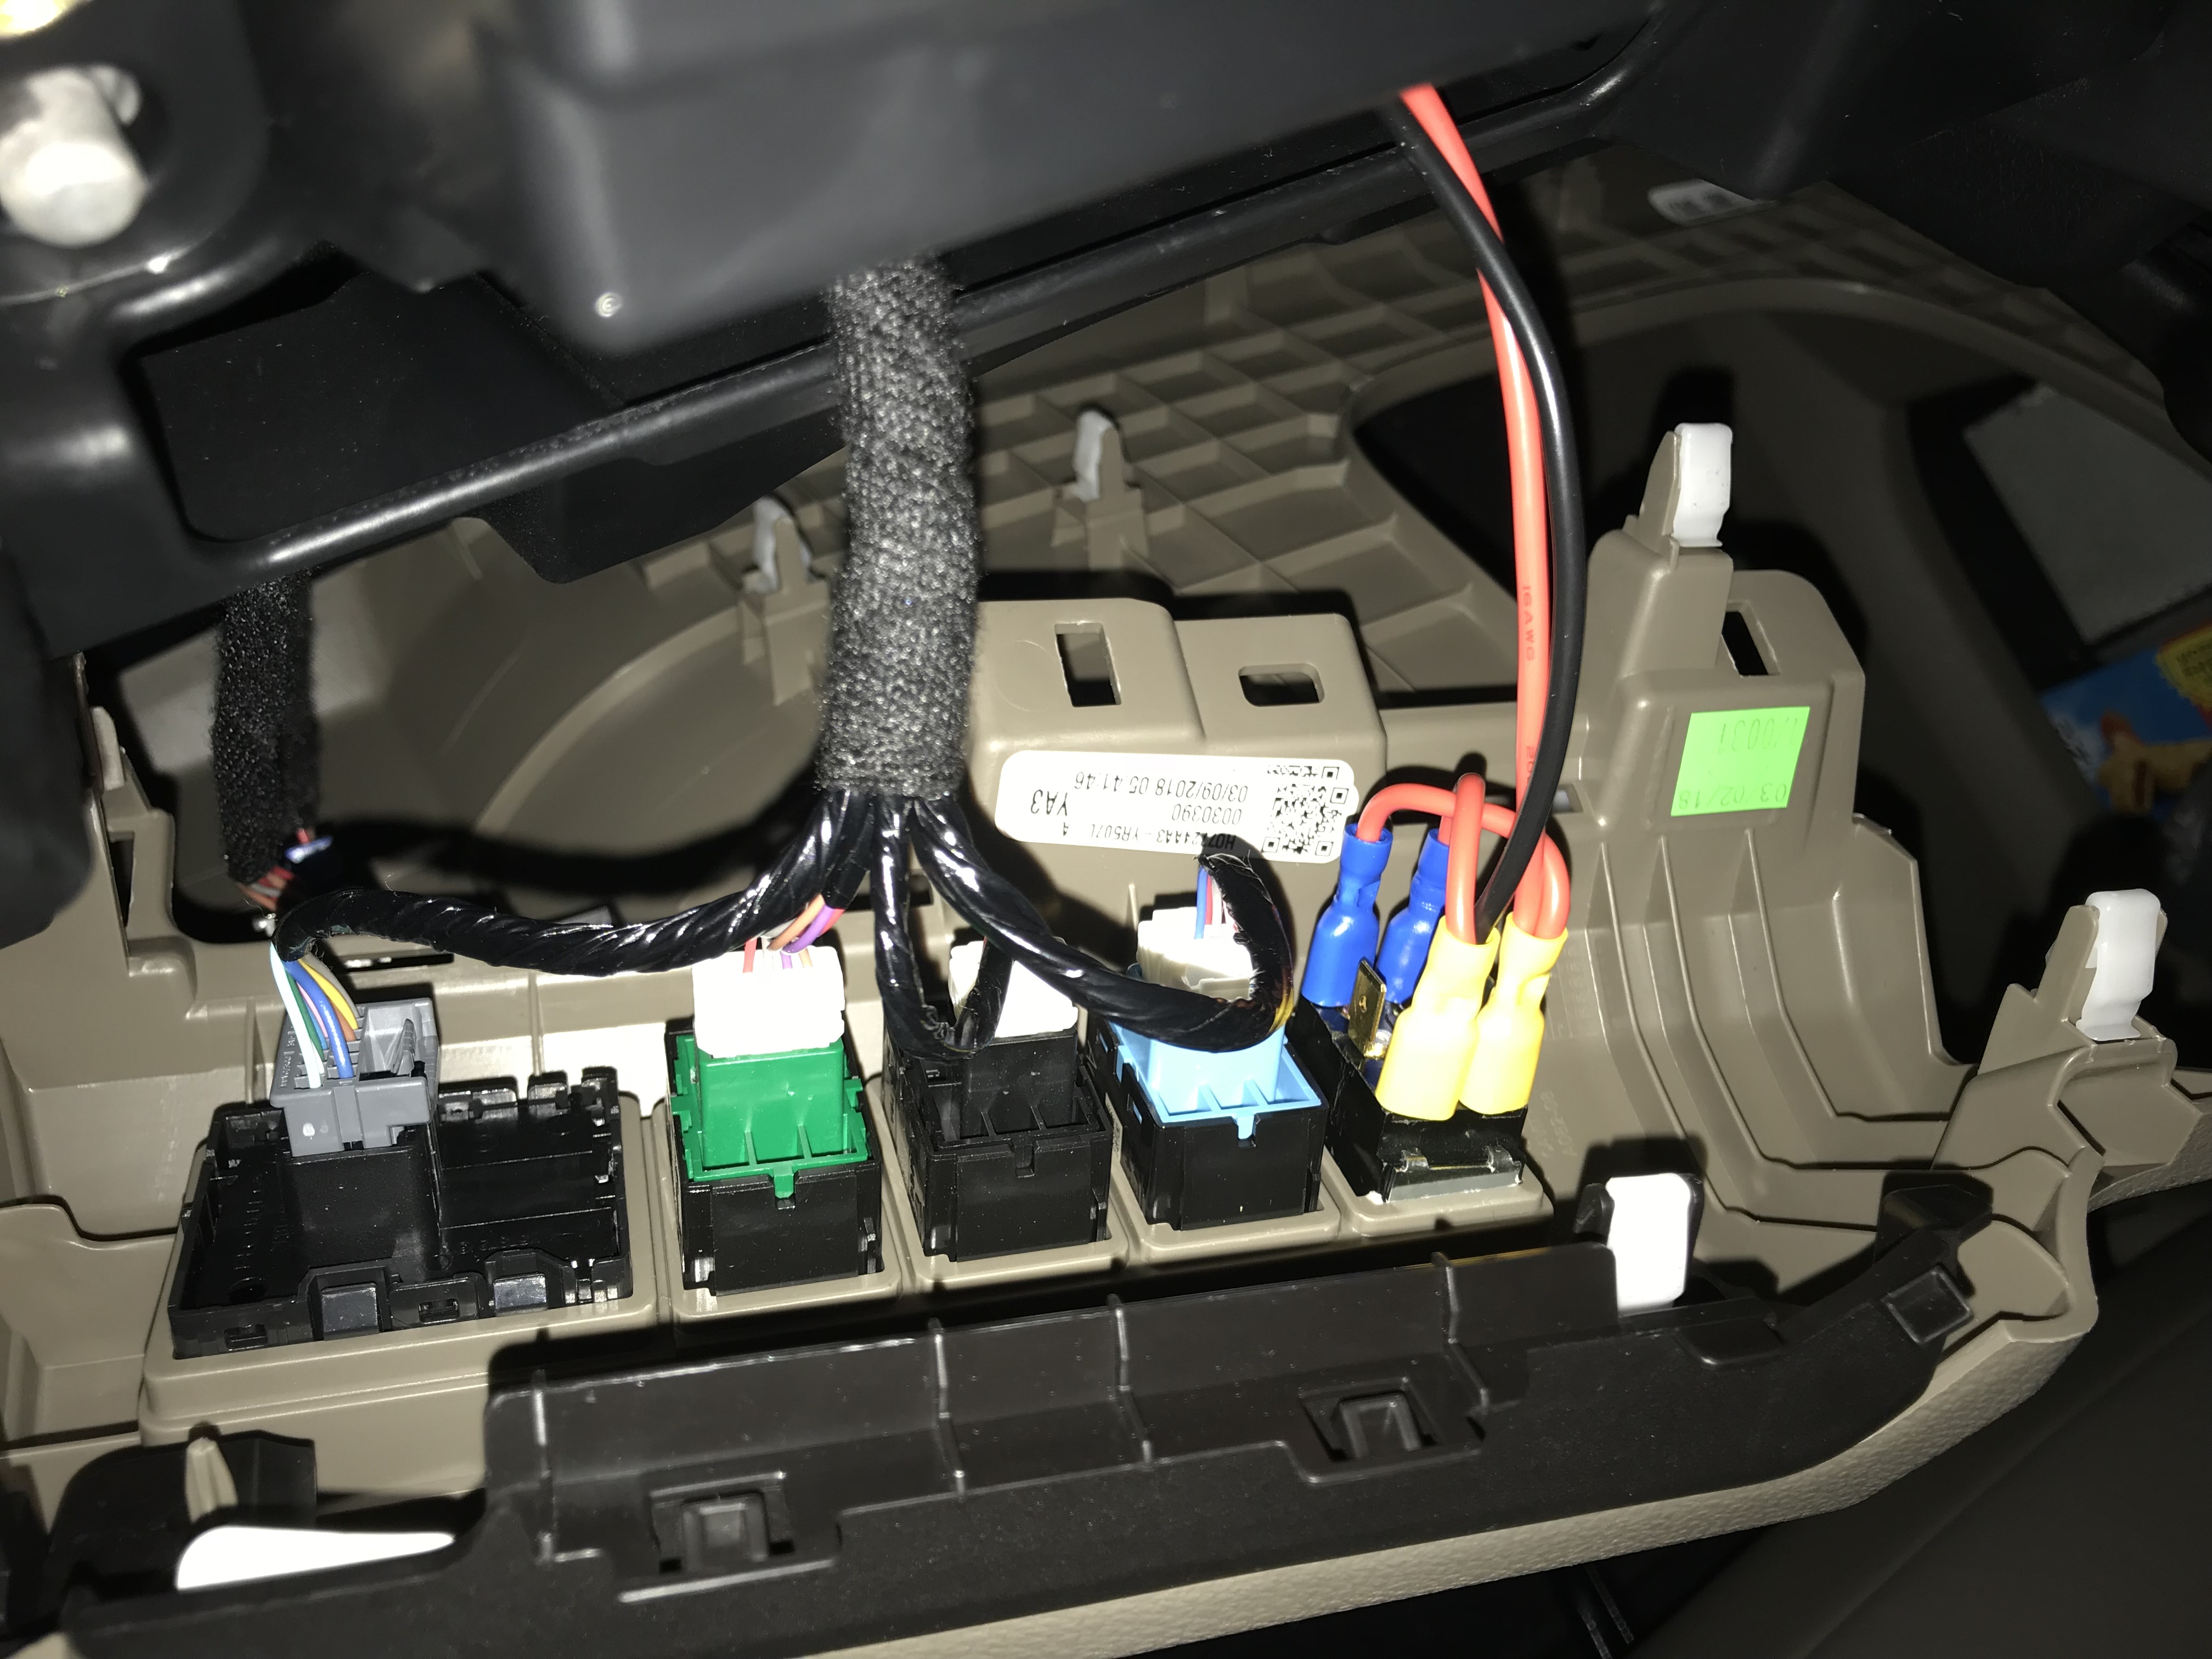
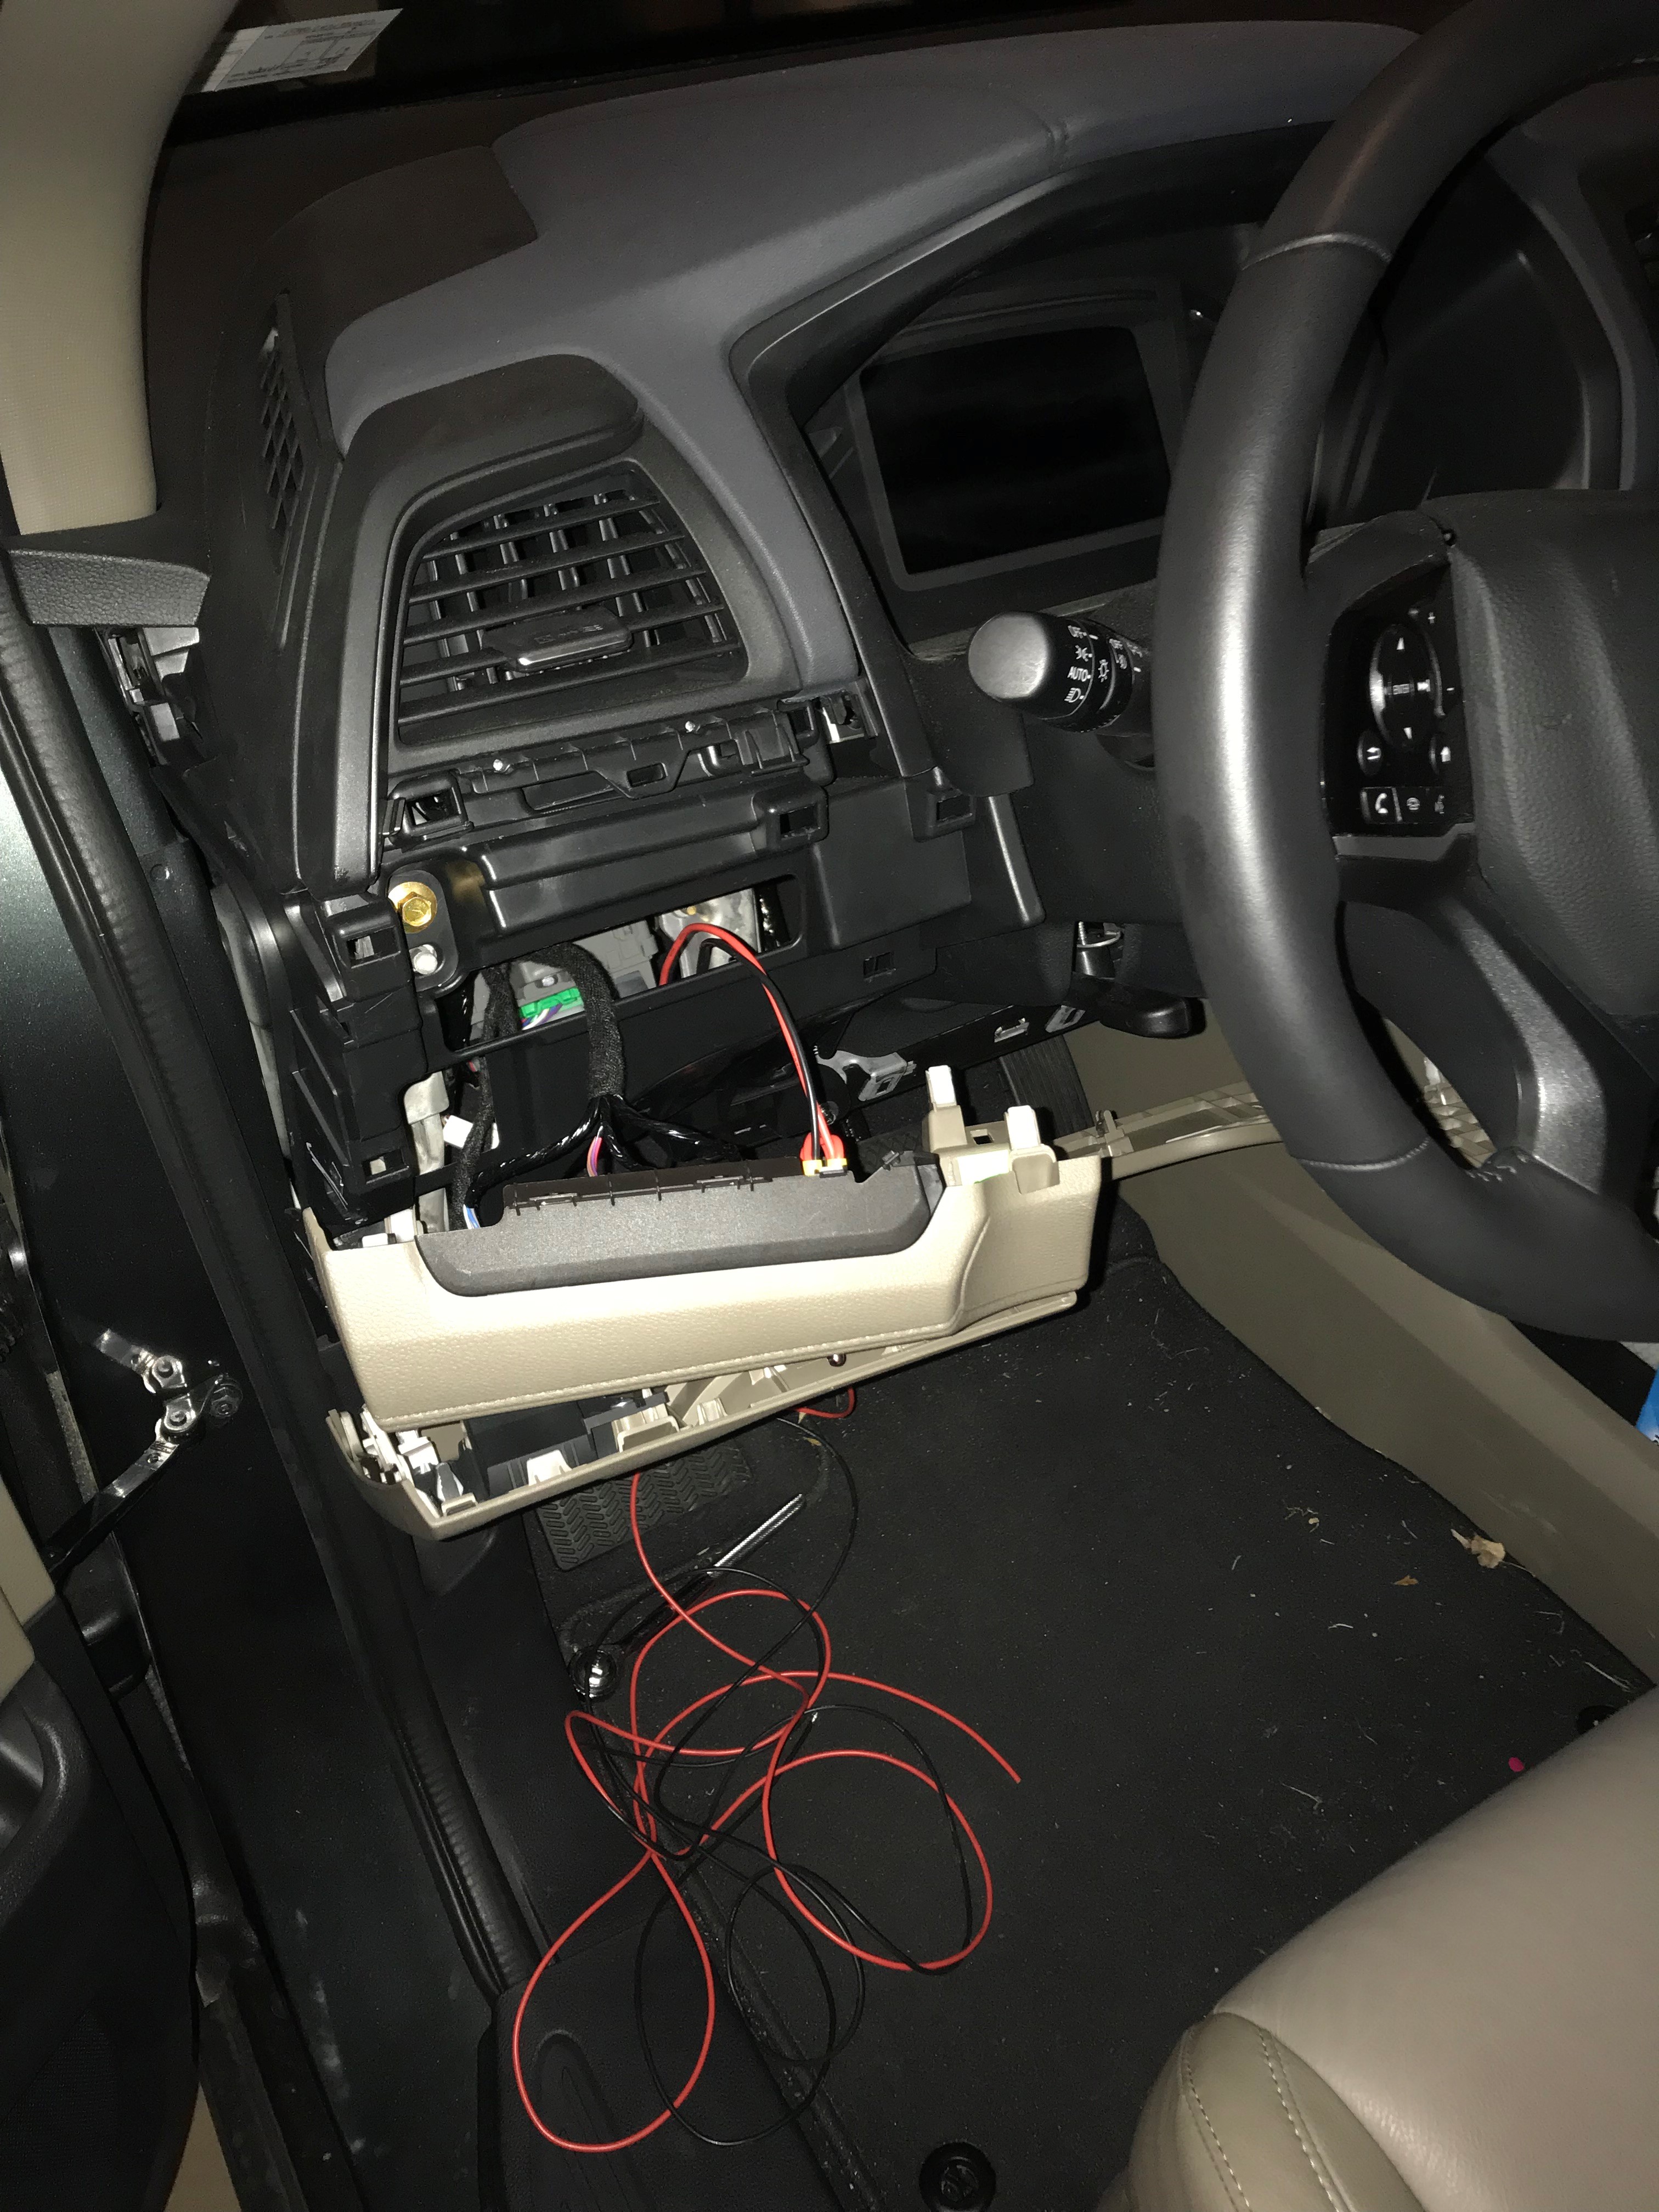
Connect the wires to the switchUnder the dashboard, find the two wires (red / black) and crimp a 1/4" female quick connect to each. Attach these to the inside / middle pins of the DPDT switch. Here's what the complete wiring of everything looks like: 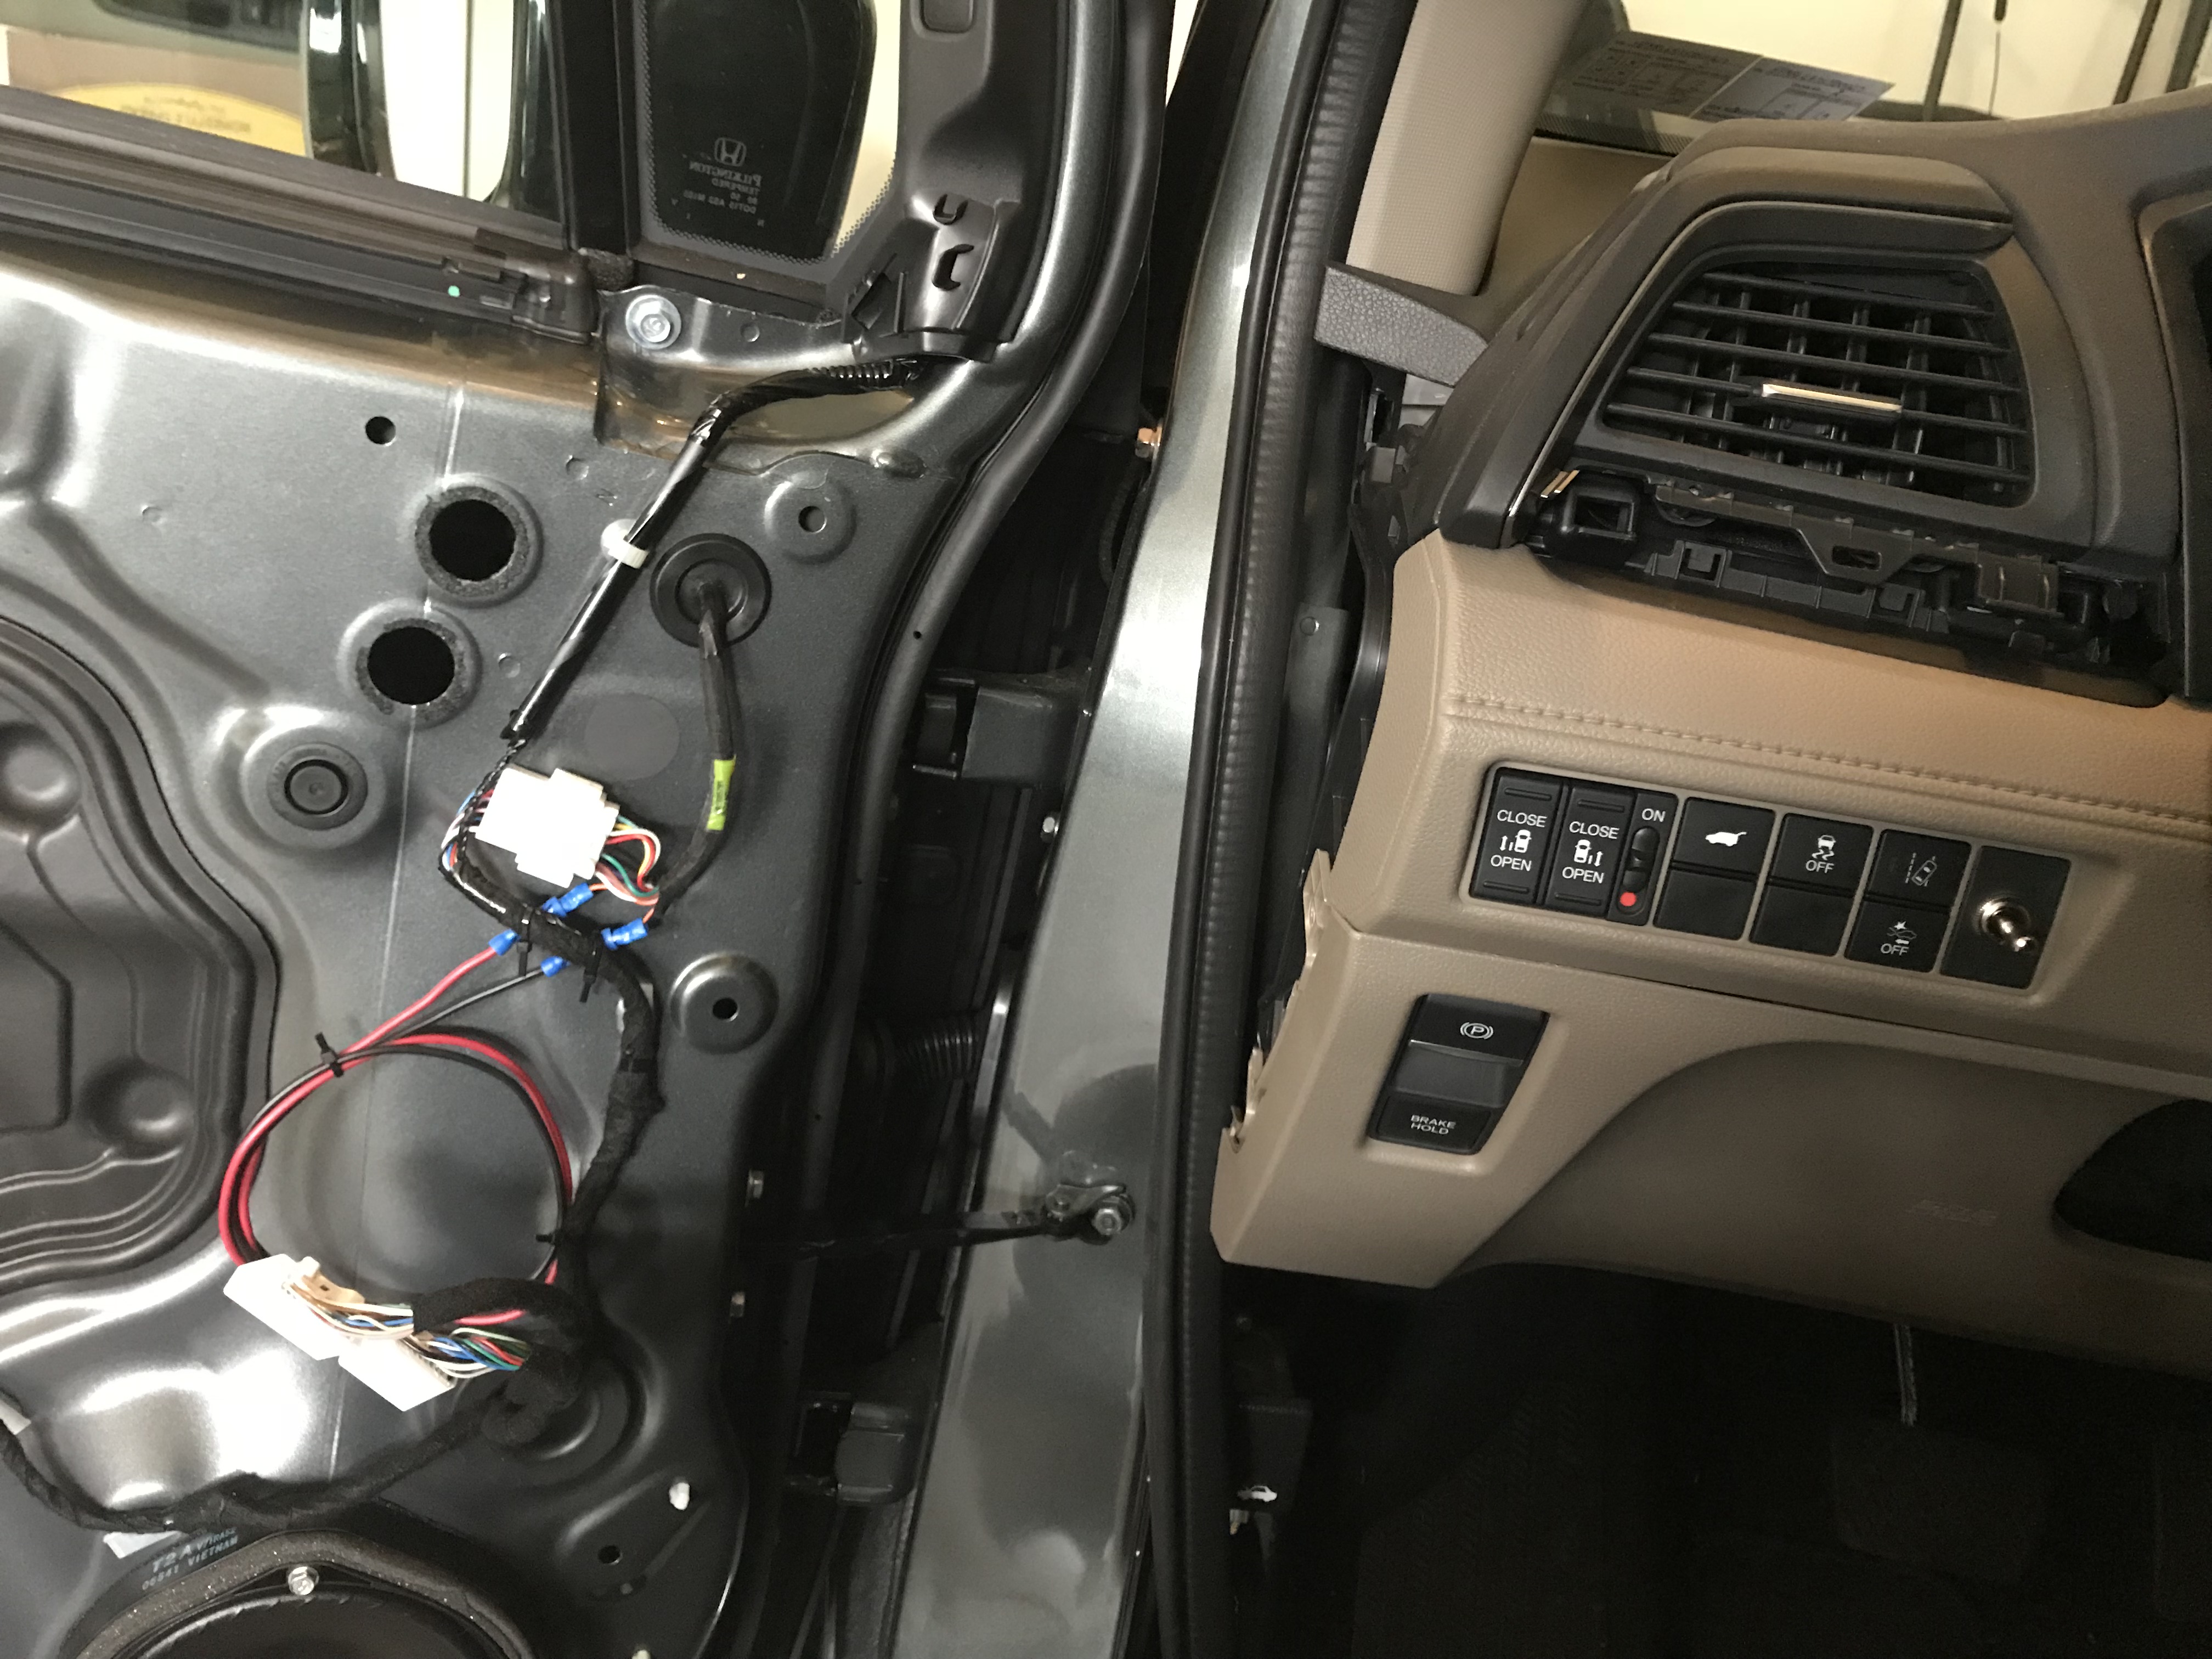
Check that everything worksAt rest the momentary DPDT switch is in the middle. Holding it up or down for a few seconds results in the power-folding mirror retracting or extending. I made it retract when toggled up and extend when toggled down. If this is reversed then simply flip the two middle DPDT switch connectors so ground and power are reversed. Questions:
|
|
Unless otherwise noted, all contents are copyright © 1997 through 2019 Zingtech Computer Solutions and Michael Matczynski (
Check out wineries at Catch Wine.com:
Alabama Wineries - Alaska Wineries - Arizona Wineries - Arkansas Wineries - California Wineries - Colorado Wineries - Connecticut Wineries - Delaware Wineries - Florida Wineries - Georgia Wineries - Hawaii Wineries - Idaho Wineries - Illinois Wineries - Indiana Wineries - Iowa Wineries - Kansas Wineries - Kentucky Wineries - Louisiana Wineries - Maine Wineries - Maryland Wineries - Massachusetts Wineries - Michigan Wineries - Minnesota Wineries - Mississippi Wineries - Missouri Wineries - Montana Wineries - Nebraska Wineries - Nevada Wineries - New Hampshire Wineries - New Jersey Wineries - New Mexico Wineries - New York Wineries - North Carolina Wineries - North Dakota Wineries - Ohio Wineries - Oklahoma Wineries - Oregon Wineries - Pennsylvania Wineries - Rhode Island Wineries - South Carolina Wineries - South Dakota Wineries - Tennessee Wineries - Texas Wineries - Utah Wineries - Vermont Wineries - Virginia Wineries - Washington Wineries - West Virginia Wineries - Wisconsin Wineries - Wyoming Wineries